How to enhance conversations with OpenAI integration
By integrating AI into your Chatlake dashboard, you can improve your customer conversations in real-time without sacrificing your unique voice or brand identity. You'll receive AI-powered suggestions that help you refine your messages and communicate more effectively with your customers.
Setting up the integration takes less than a minute, and the benefits are immediate. To get started, follow the steps below.
How to integrate OpenAI with Chatlake?
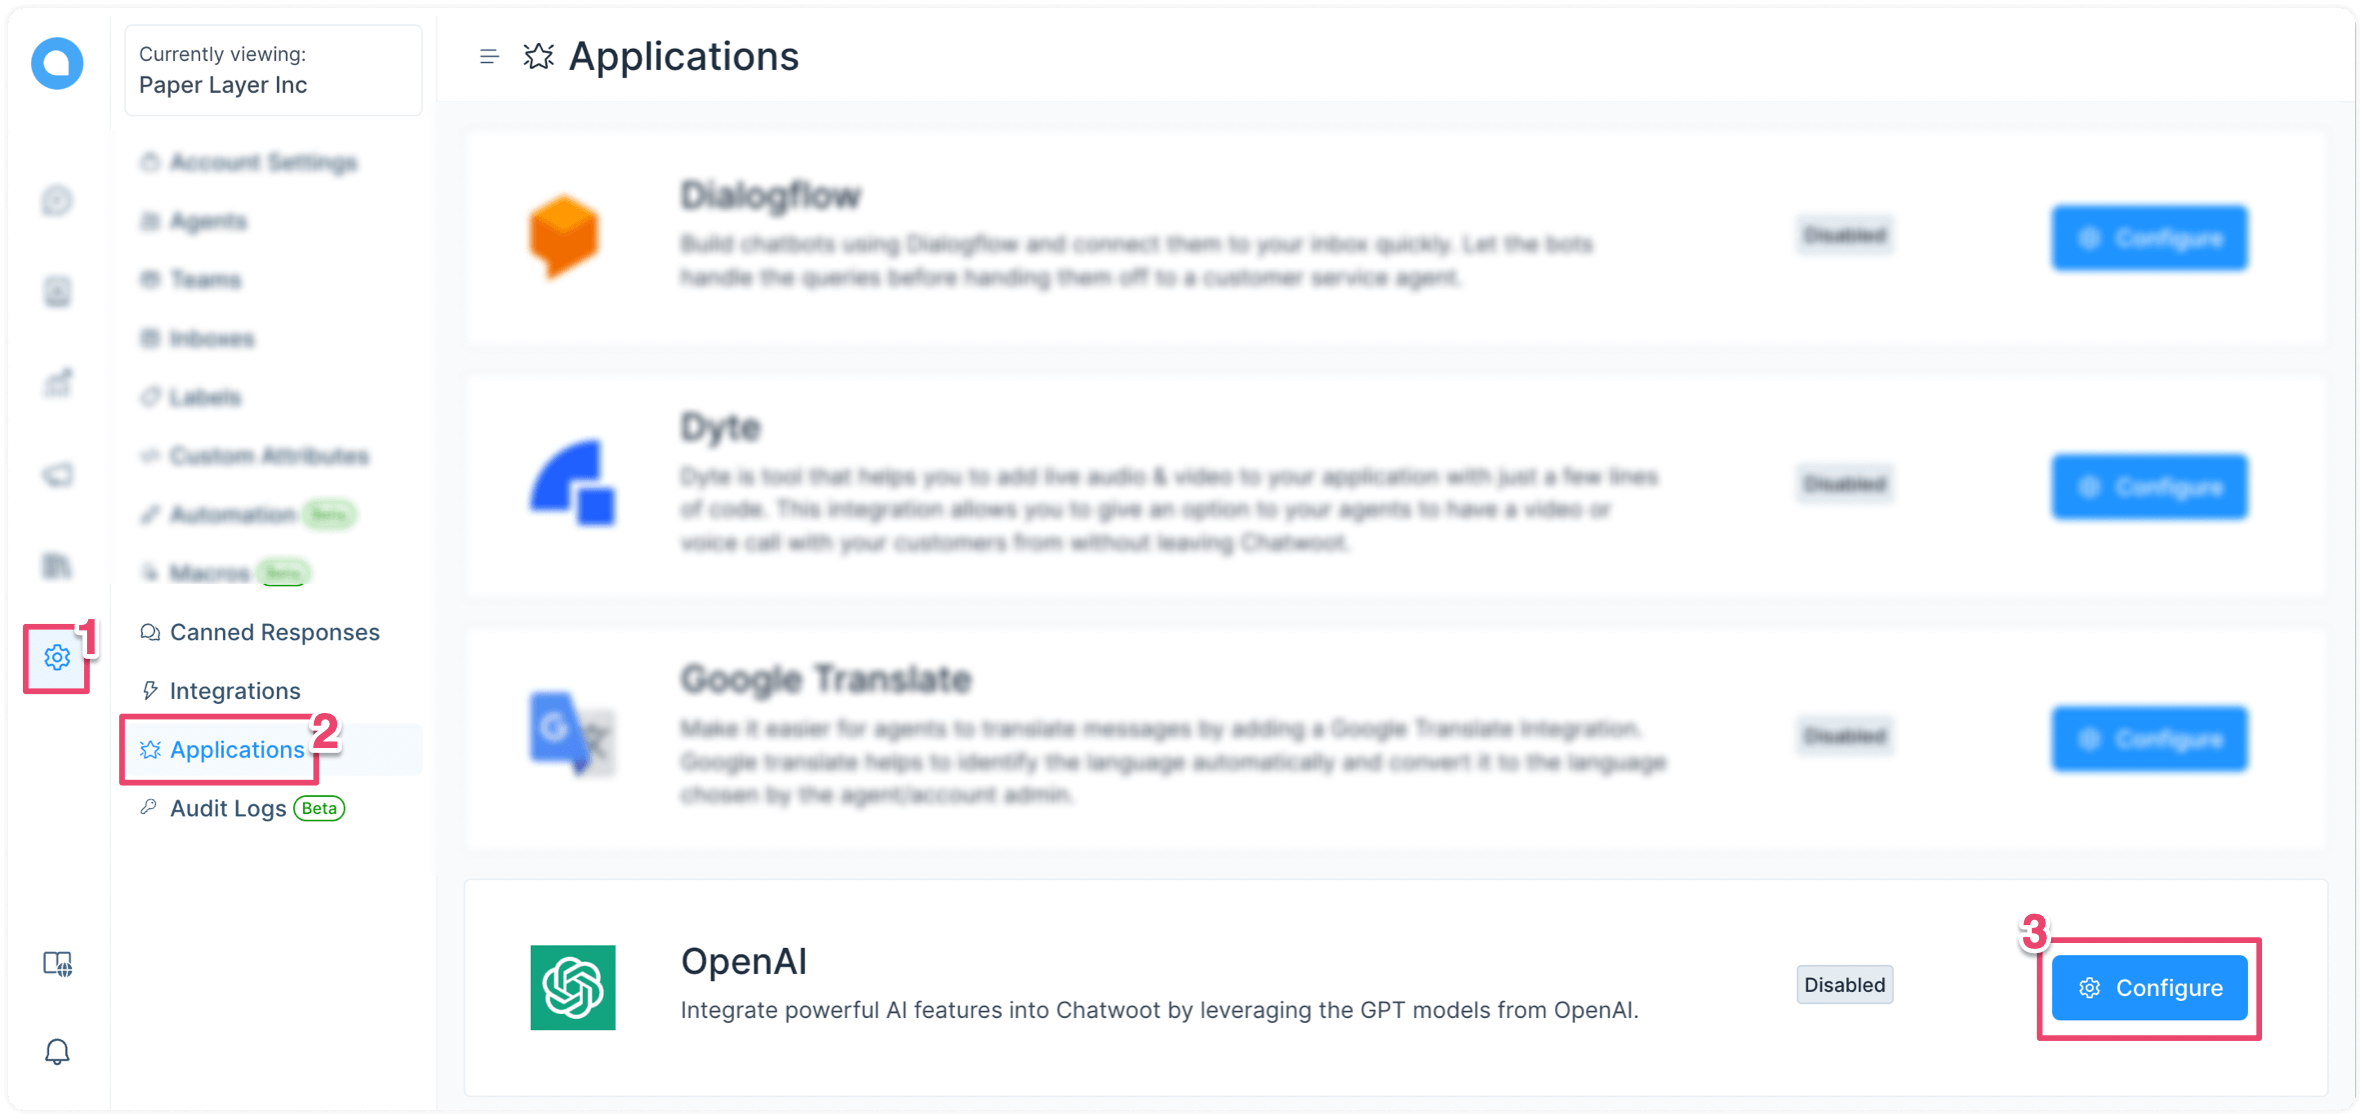
Step 1. Go to Settings → Applications → OpenAI. Click the corresponding “Configure” button.
Step 2. Click the "Connect" button. A modal will pop up, asking for your OpenAI API key.
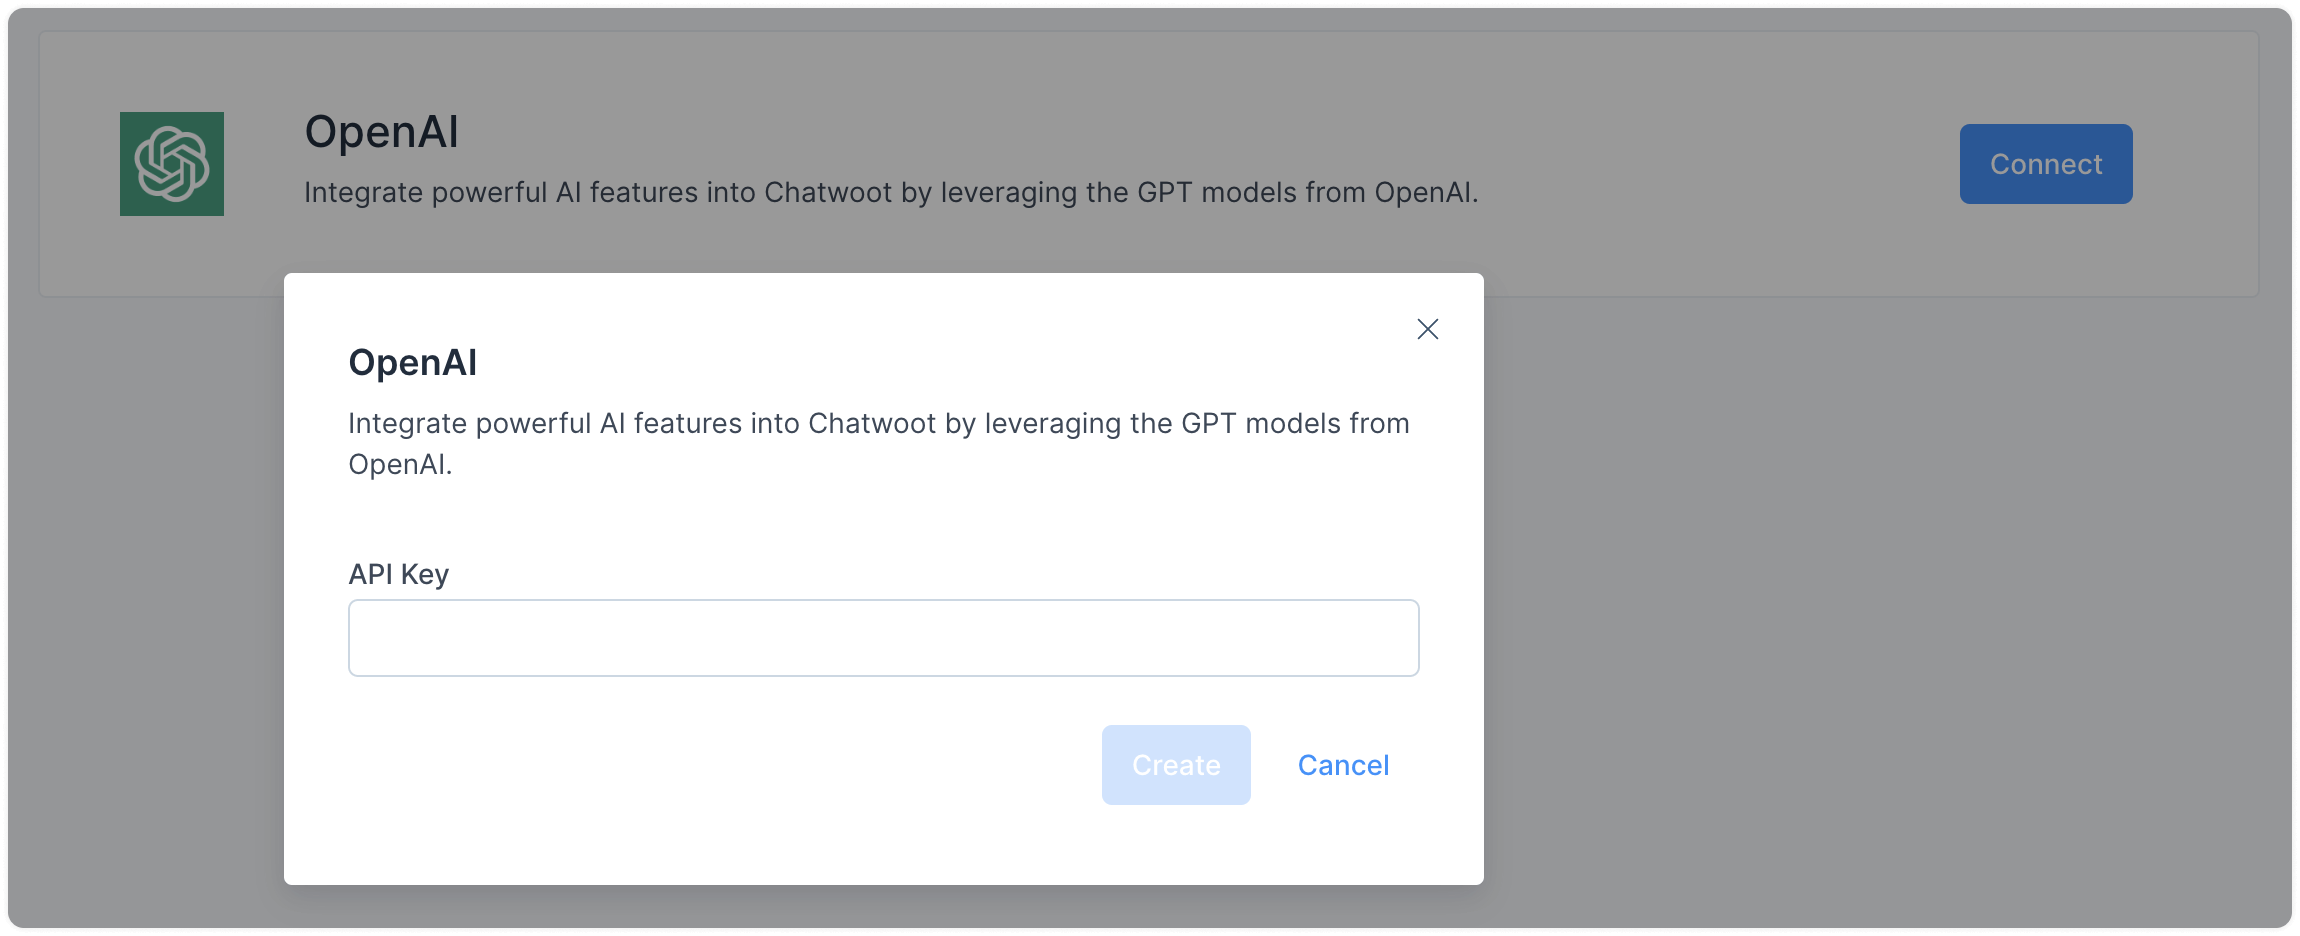
To get your OpenAI API key, log in to your OpenAI account and visit this link.
Once you enter your secret API key, you'll see a success message on the screen.
How to use the AI features in Chatlake?
There are three AI-powered features in Chatlake. The sections below explain how to use them.
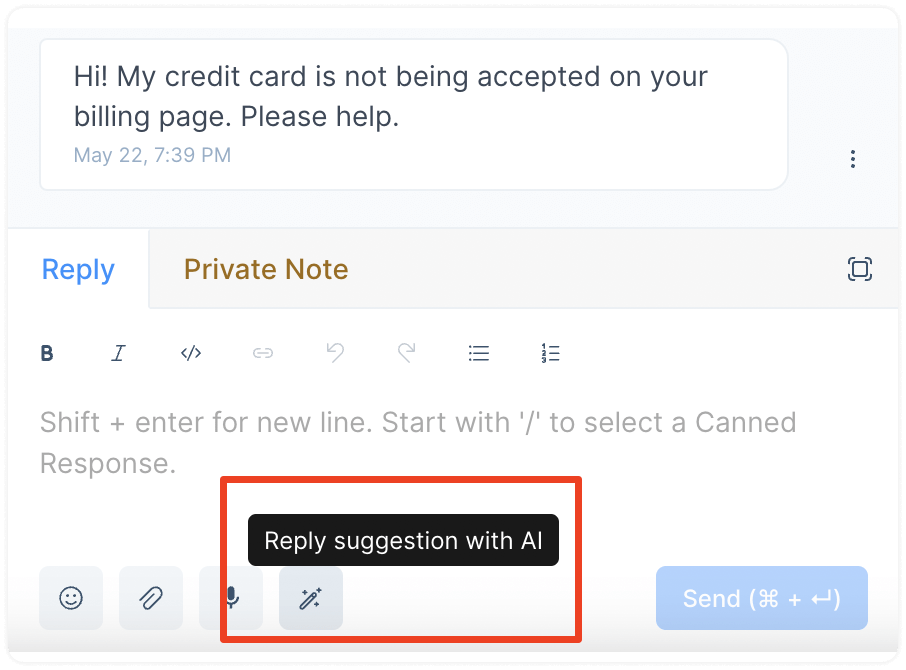
Reply suggestion with AI The “Reply suggestion with AI” feature suggests a possible reply to a message from a customer, helping with fast responses. Follow the steps below to use this feature.
Step 1. Go to your Conversations tab from the sidebar and open a conversation that needs a reply. You should be able to see a new option called "Reply suggestion with AI." Here's an example:
Step 2. Click the button to see the suggestion. The reply box will be populated with the suggested response.
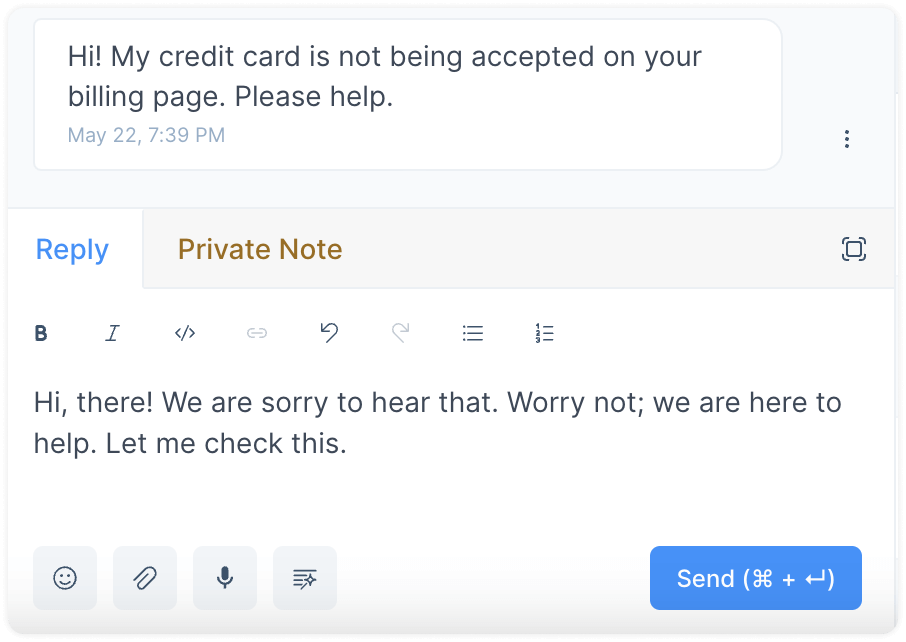
Step 3. Edit your message as you please, and hit the Send button!
Improve with AI The “Improve with AI” feature suggests improvements to your message drafts as you compose them. Follow the steps below to use this feature.
Step 1. Go to your Conversations tab from the sidebar and open a conversation. Start typing a message in the text box. As you write it, you should be able to see a new option pop up called "Improve with AI." Here's an example:

Step 2. Click the "Improve with AI" button to see your options.
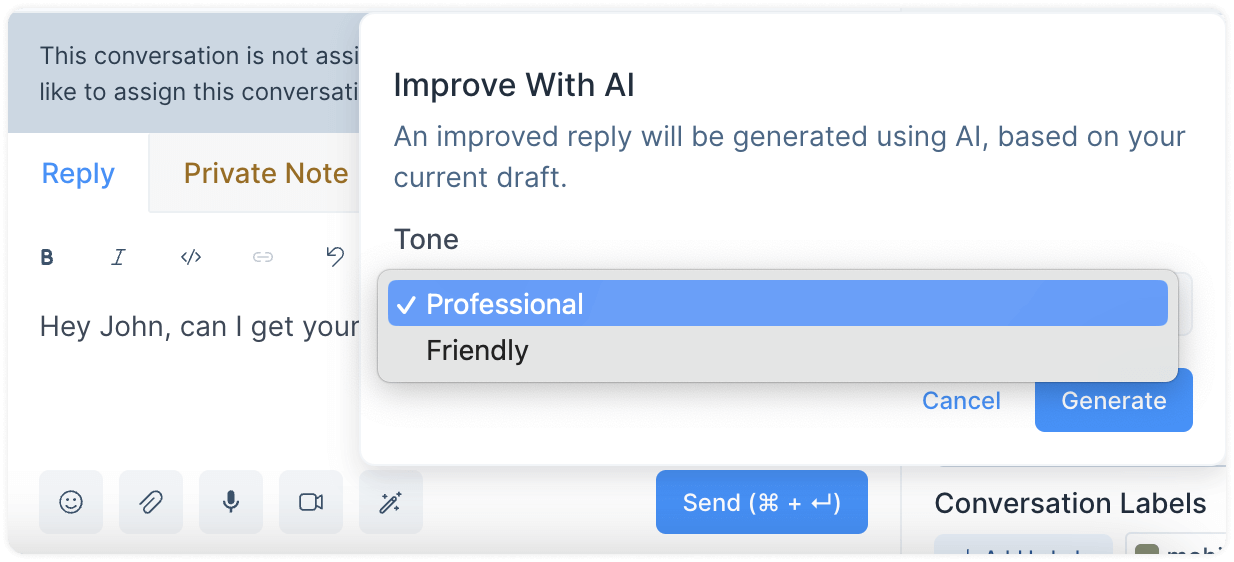
Select a tone for your message – professional or friendly. Click the "Generate" button.
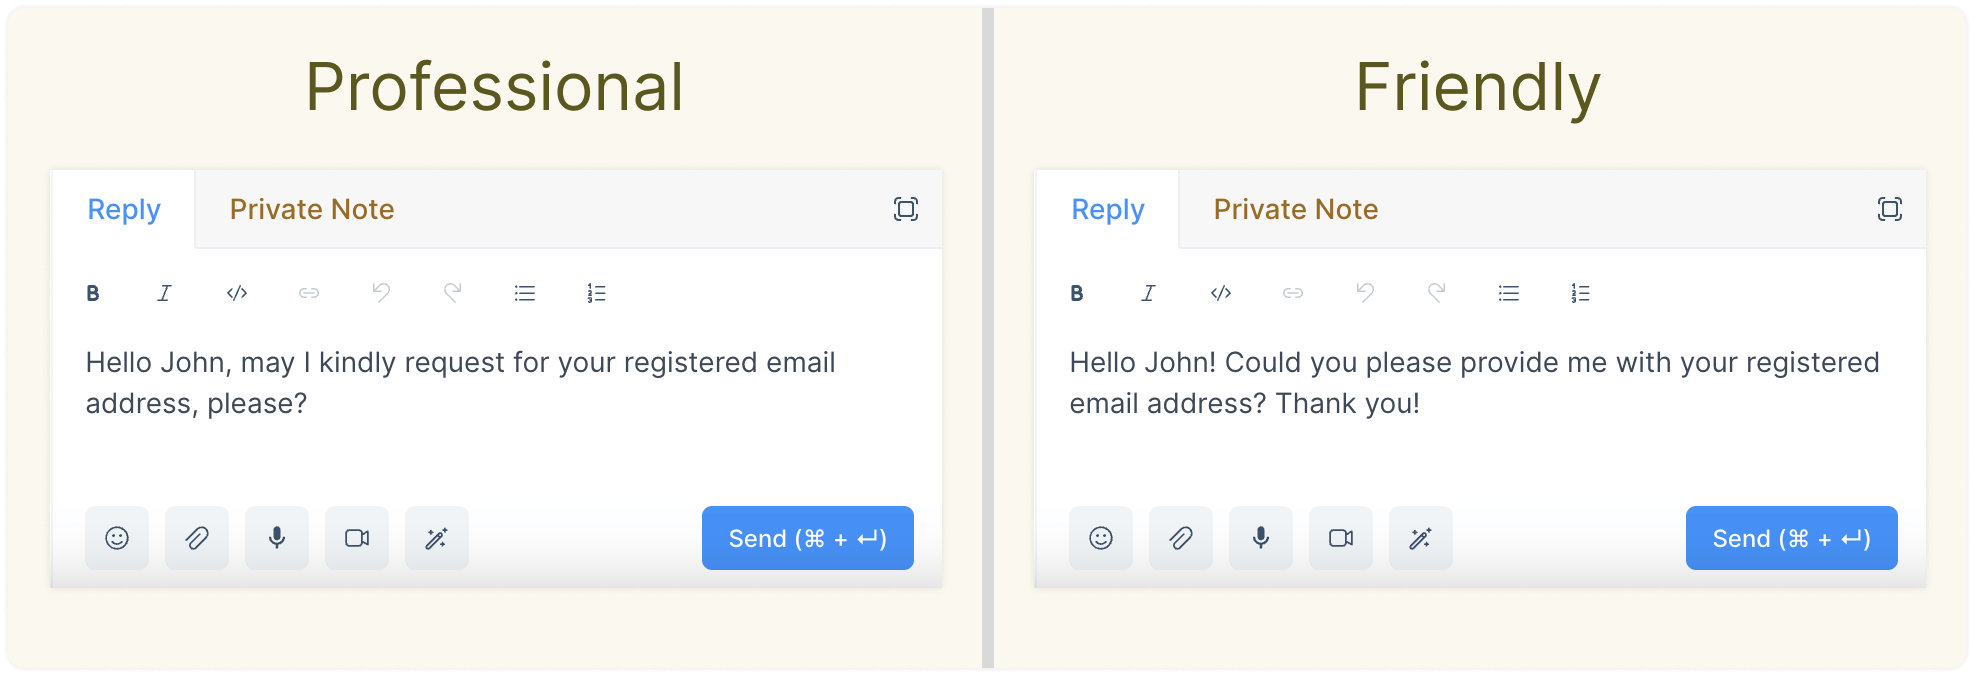
Based on your tone selection, the AI will rewrite your message and instantly populate the text box with the new message. Continuing the example, this is what it would look like:
Step 3. Edit your message as you please, and hit the Send button!
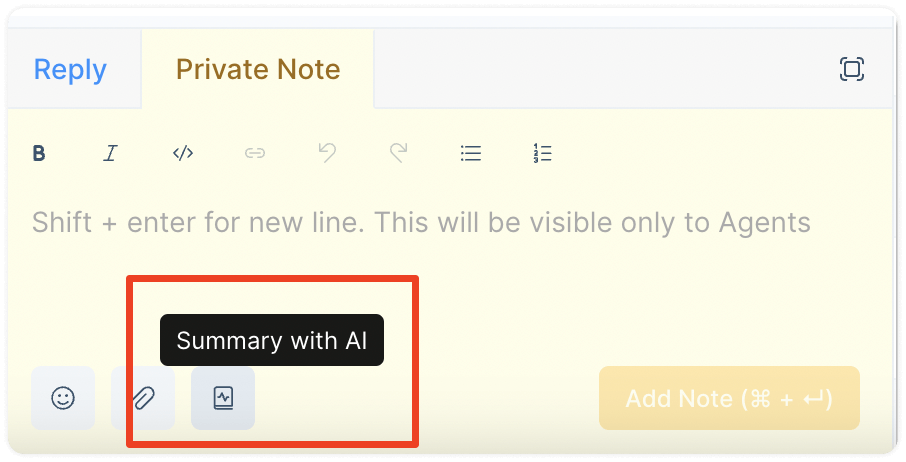
Summary with AI The “Summary with AI” feature summarizes conversations in Private Notes within seconds. Follow the steps below to use this feature.
Step 1. Go to your Conversations tab from the sidebar and open a conversation. Switch to the “Private Note” tab. You should be able to see a new option called "Summary with AI." Here's an example:
Step 2. Click the button. The text editor will be populated with a summary of the conversation.

Step 3. Edit your note as you please, and hit the ‘Add Note’ button!