Conversation Workflow
The customer initiates a conversation from the website front end - through the widget.
For example: Customer types in 'hi'
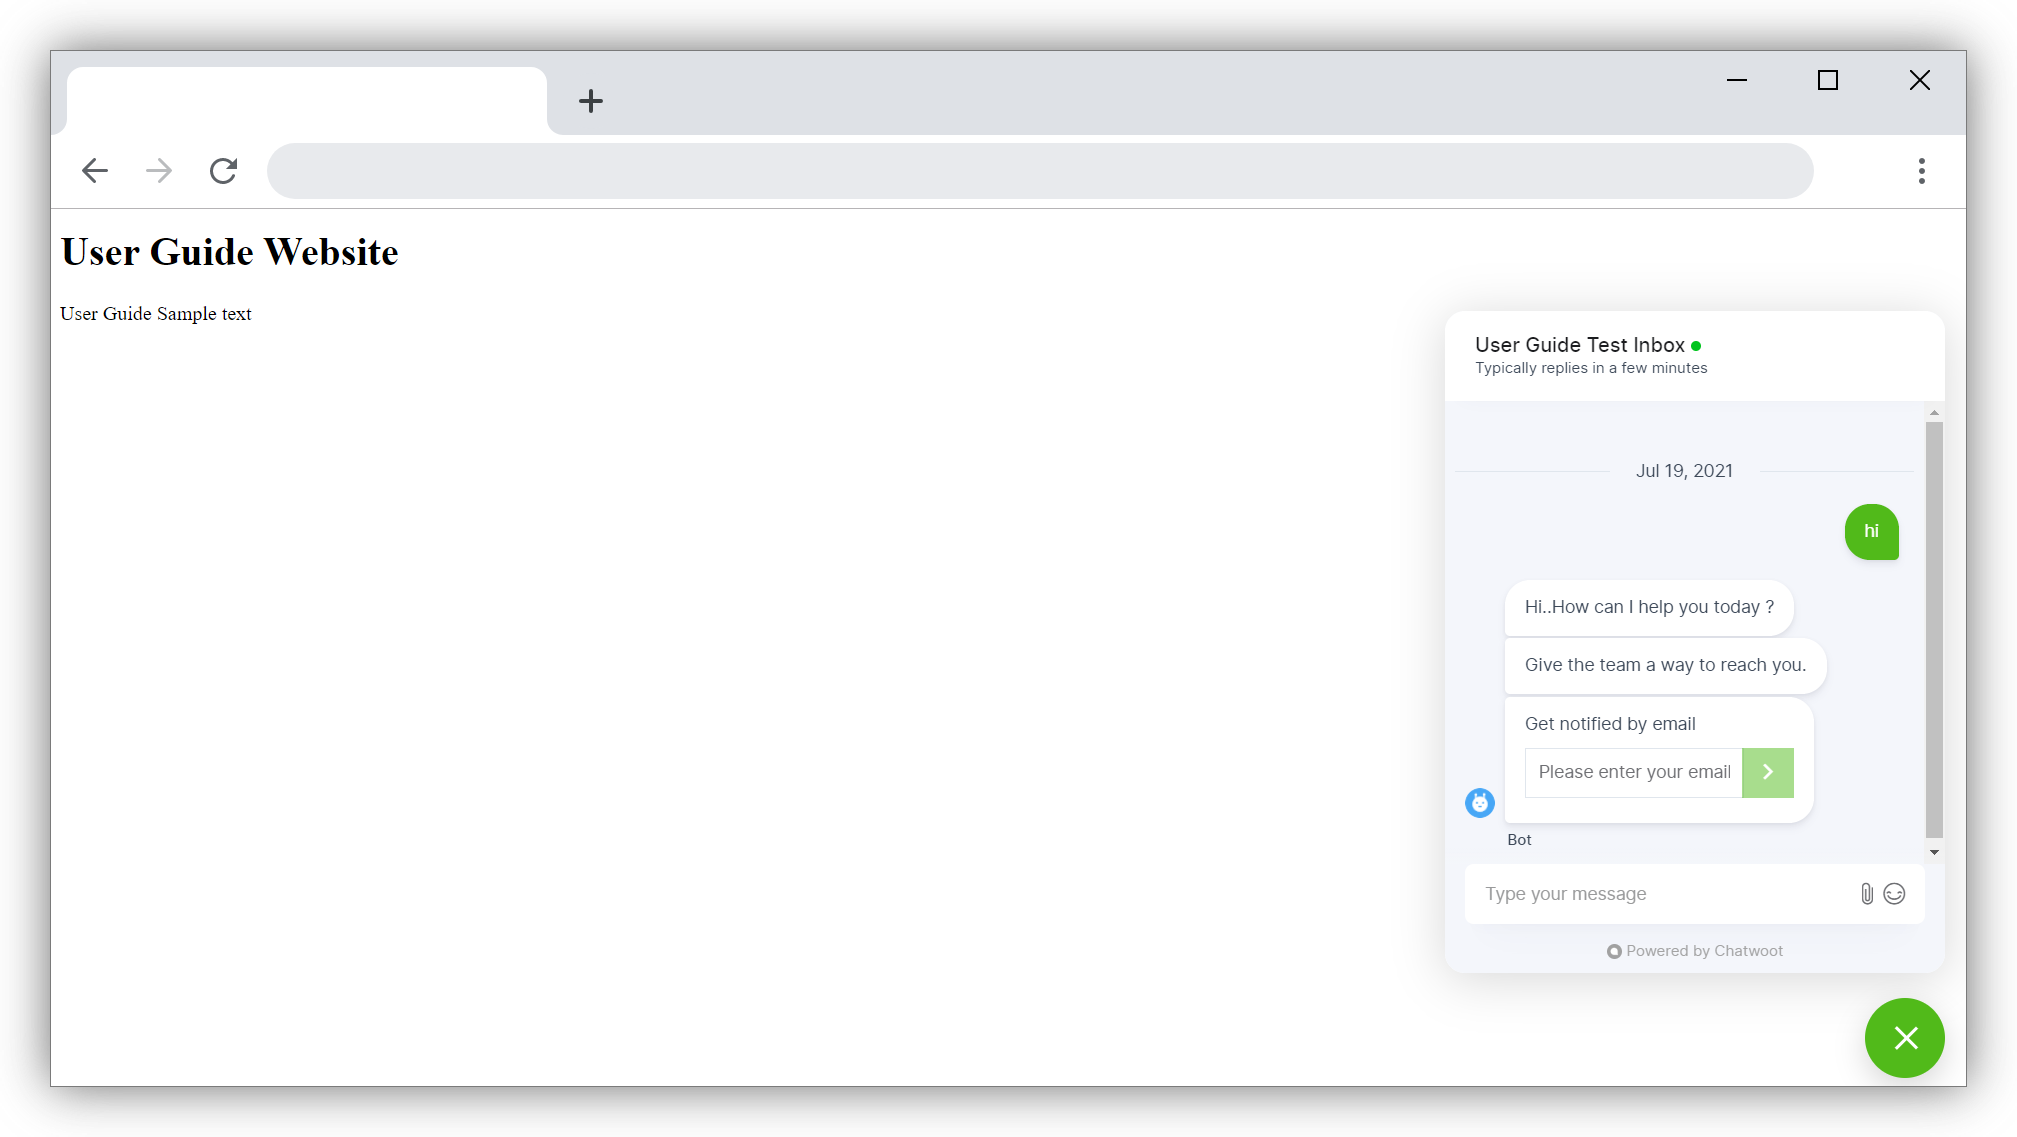
Automated response set in channel greeting message will immediately be displayed on the screen as a reply. In addition, two more automated messages will be sent by 'bot' to collect customer's information - email id - for further communication and record.
Campaigns
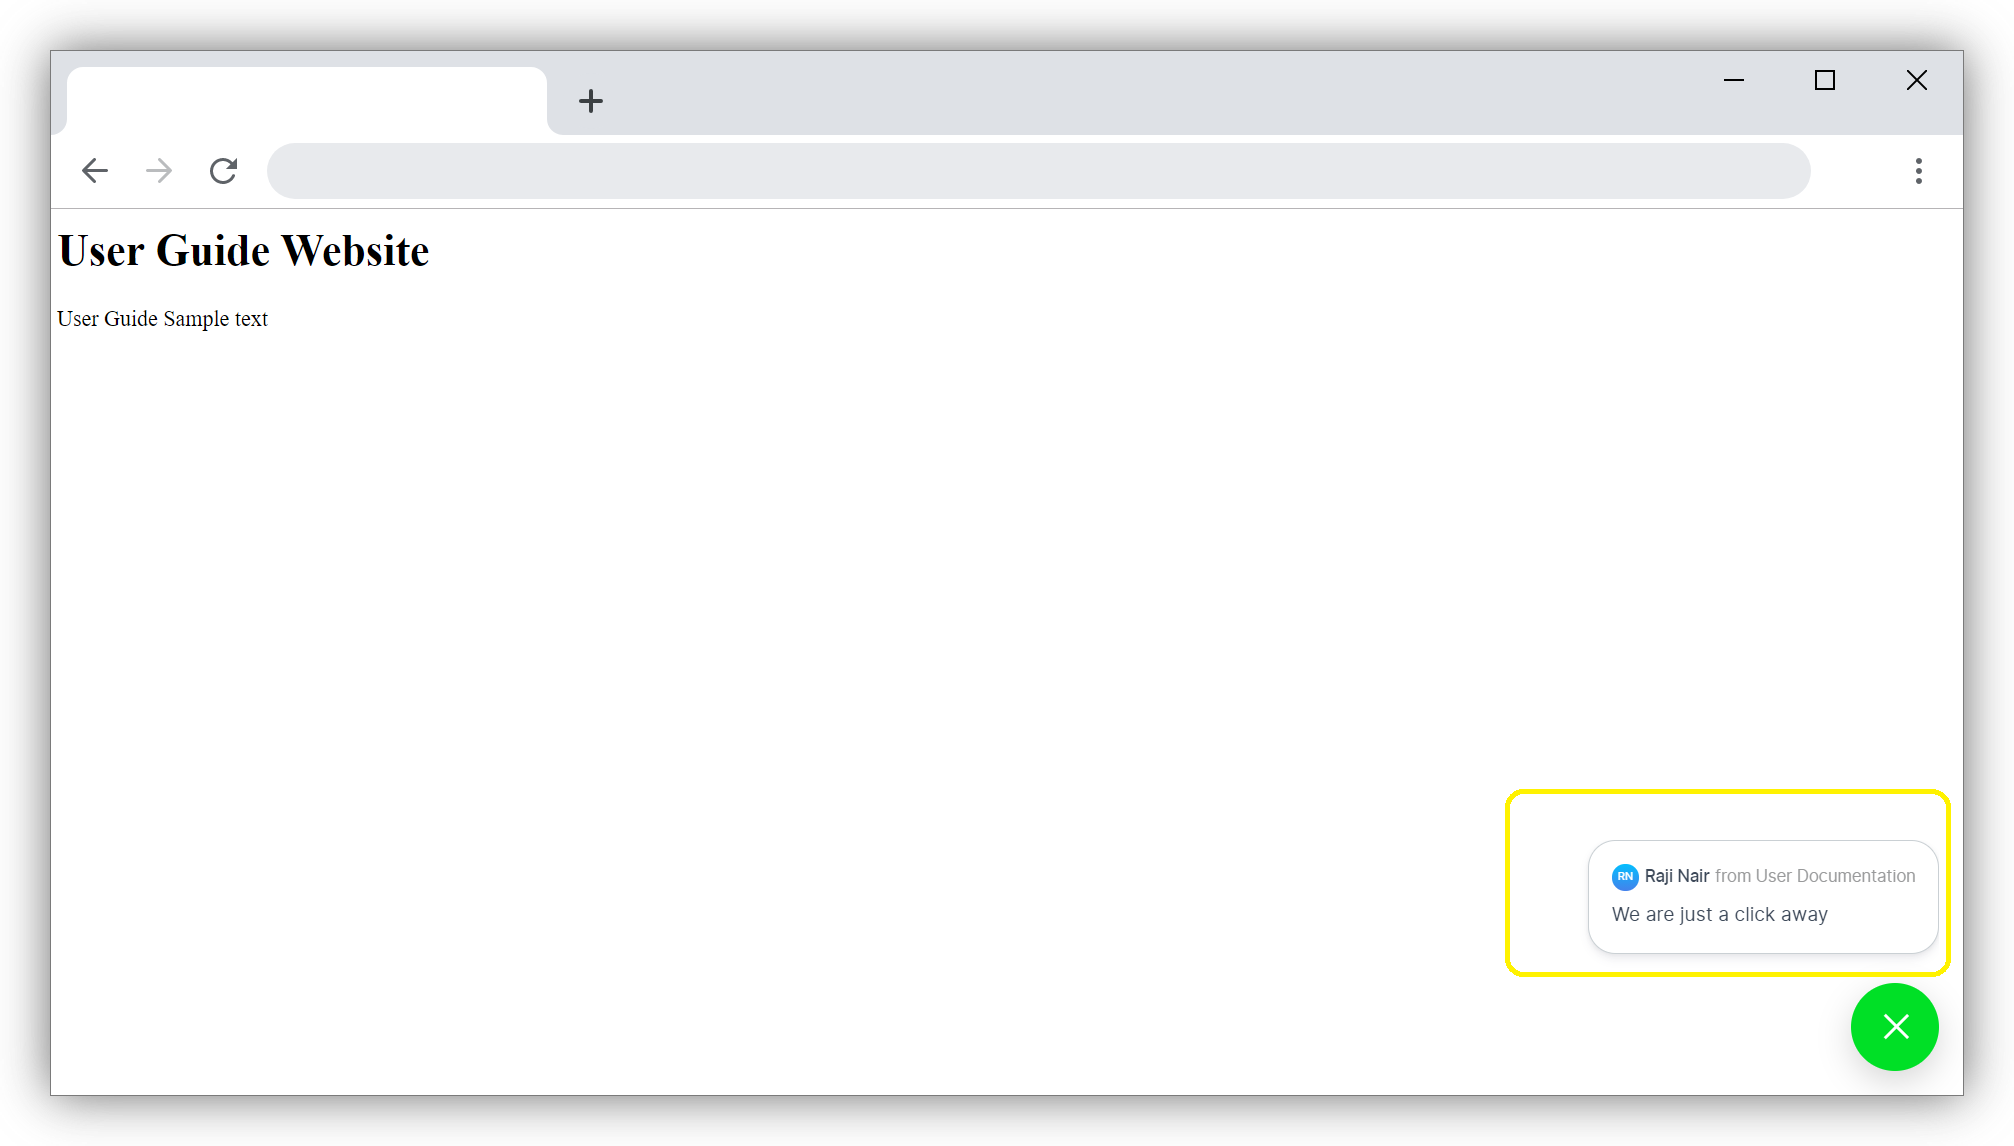
If the customer does not initiate conversation and you have enabled Campaign message, the message will be displayed on the screen just above the widget to attract customer attention.
Pre Chat Forms
If we have enabled Pre Chat forms in Inbox, as soon as the customer clicks on chat widget, the message requesting for name and e-mail id will appear on screen as below.
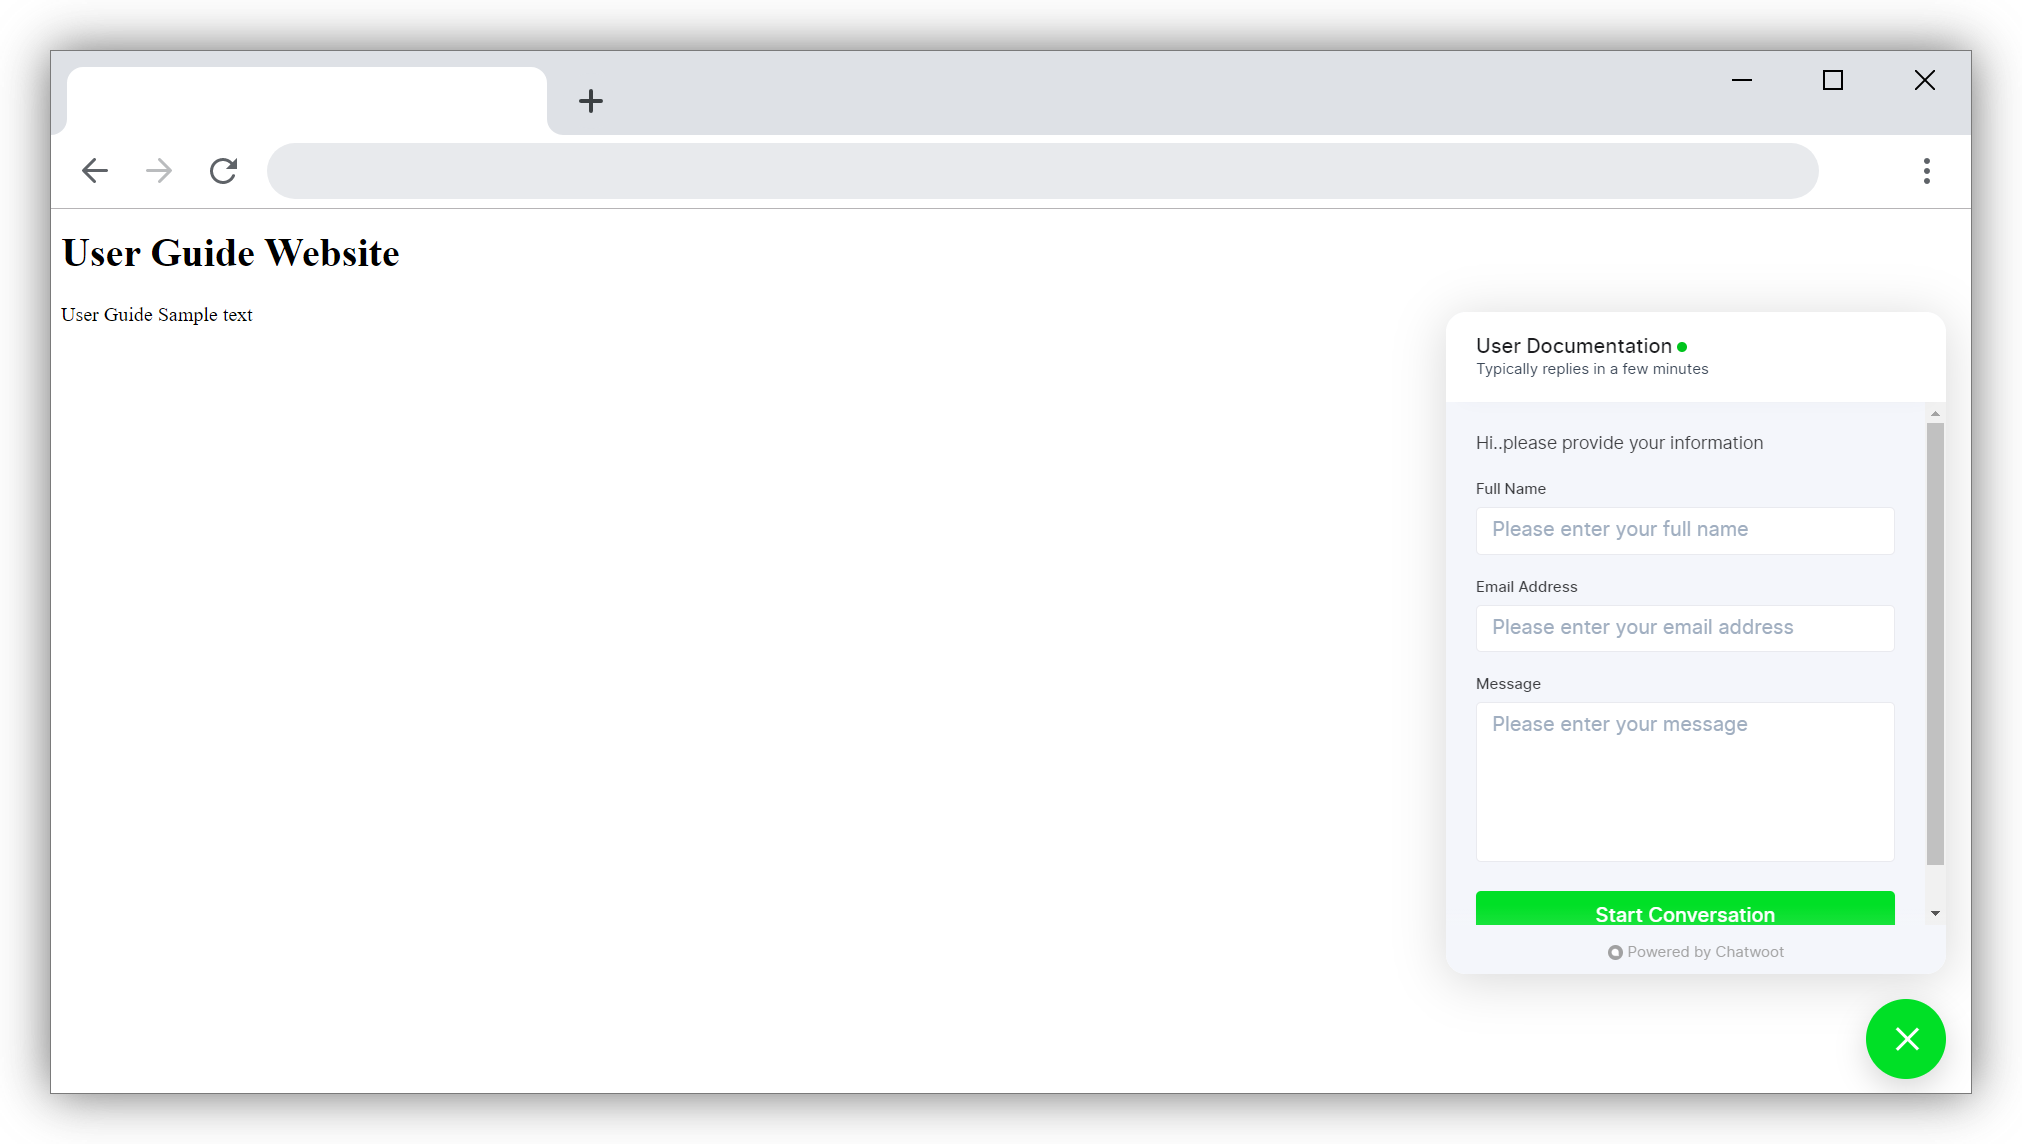
You can find more details about configuring pre-chat form via this guide
Now let us look at how this message is captured in the Agent Dashboard.
Conversations
Go to the home screen of Chatlake Agent Dashboard

Click on Conversations. Then click on All. The conversation which the customer has initiated can be seen here.
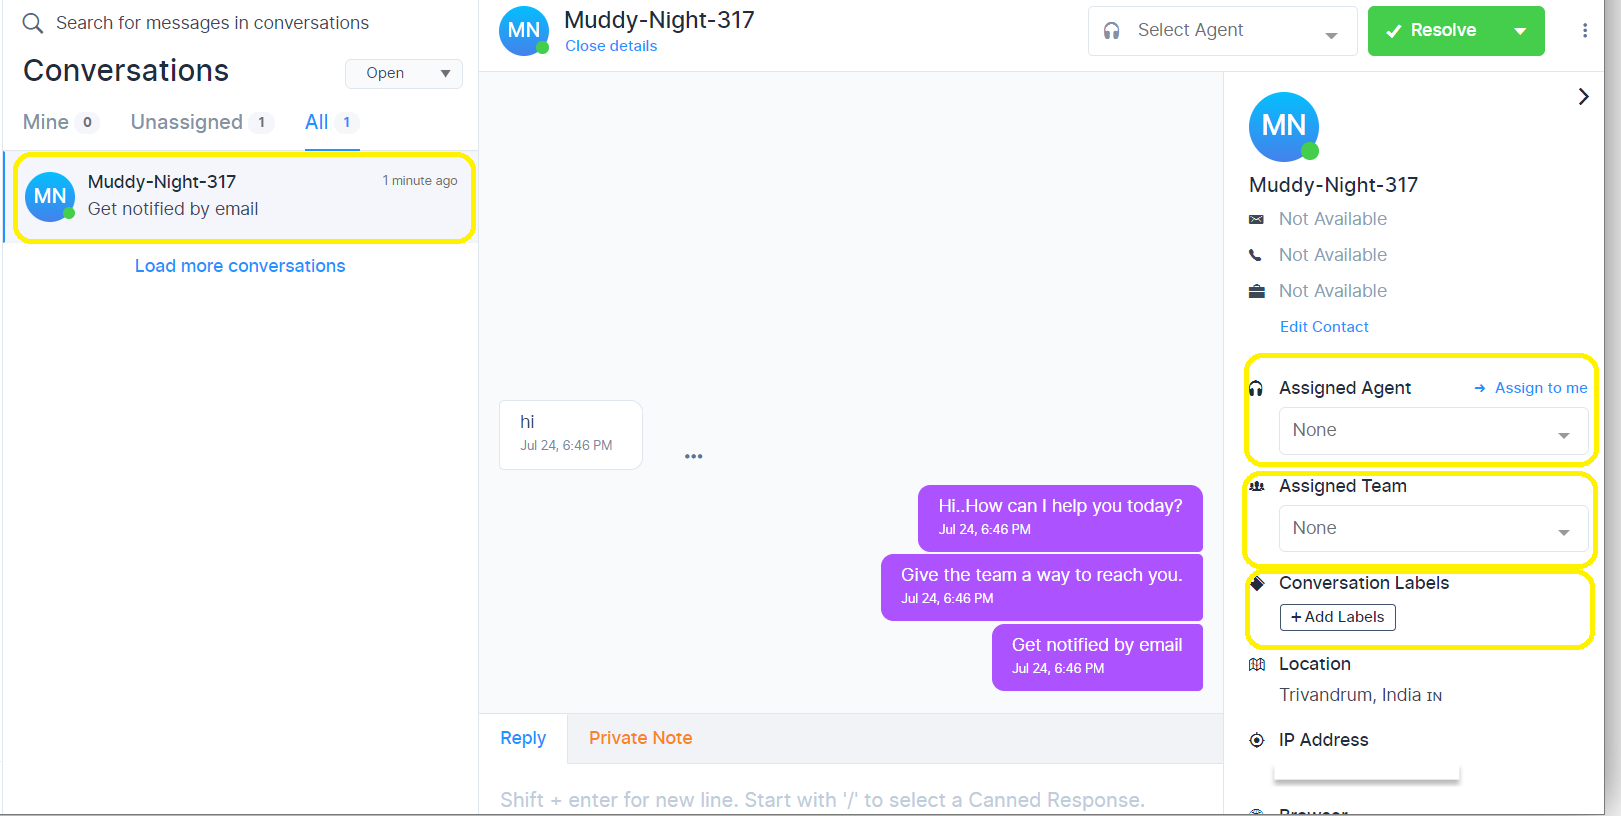
The details of the conversation open up in the right-hand side panel.
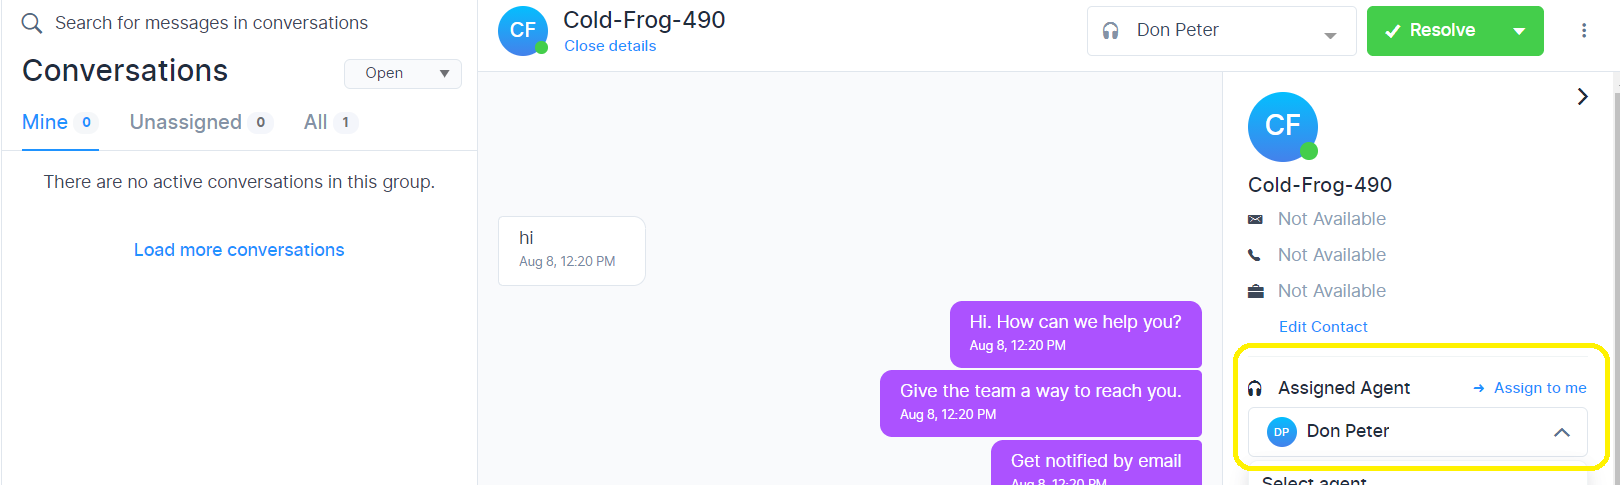
Assign Agent
If the inbox has been created with 'auto assign' not clicked, the conversation will not be automatically assigned to any agent. Click on the drop-box below Assigned Agent and select the Agent name. You can change the agents assigned here at any time.
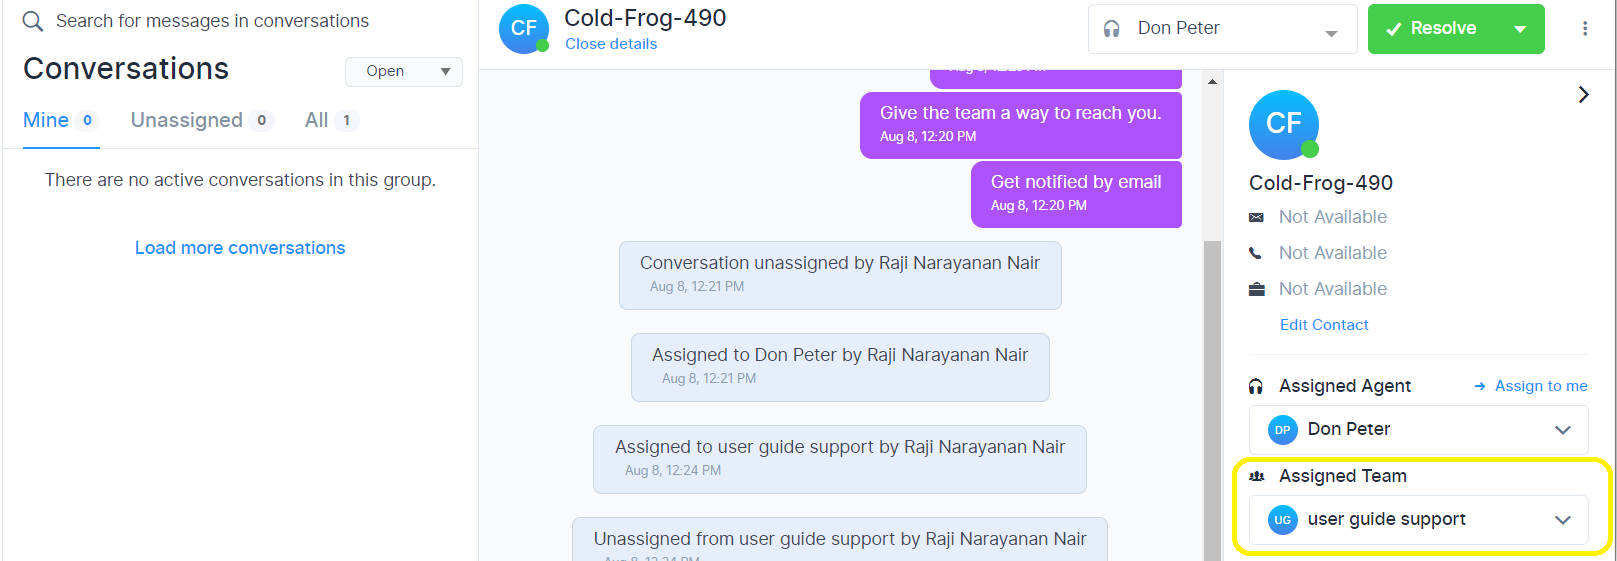
Assign Team
Click on the drop-box below Assigned Team and select the team to which this conversation belongs.
Assign Labels
Click on Add Labels below Conversation Labels and select the category to which this conversation belongs.
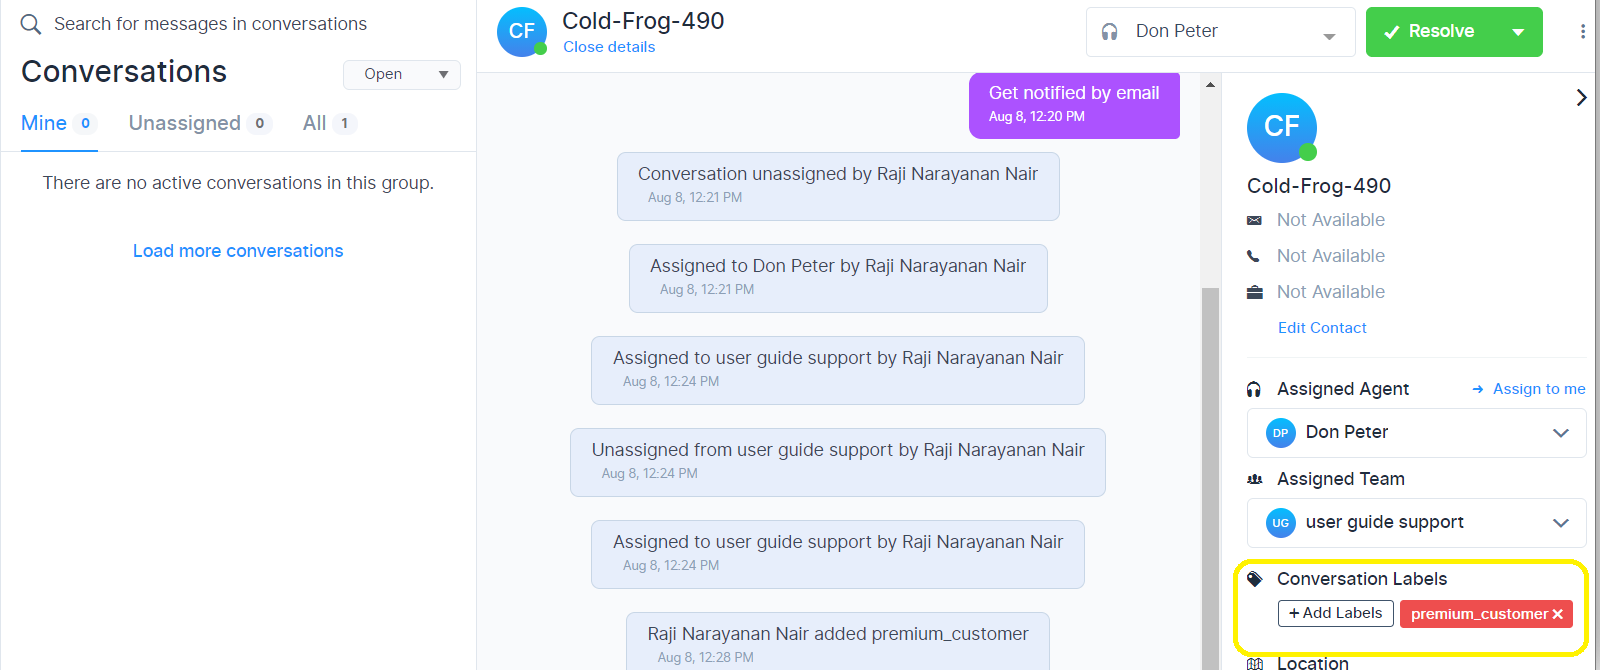
You can see in the below screenshot that all actions done by you are seen in the chat window in Agent Dashboard.
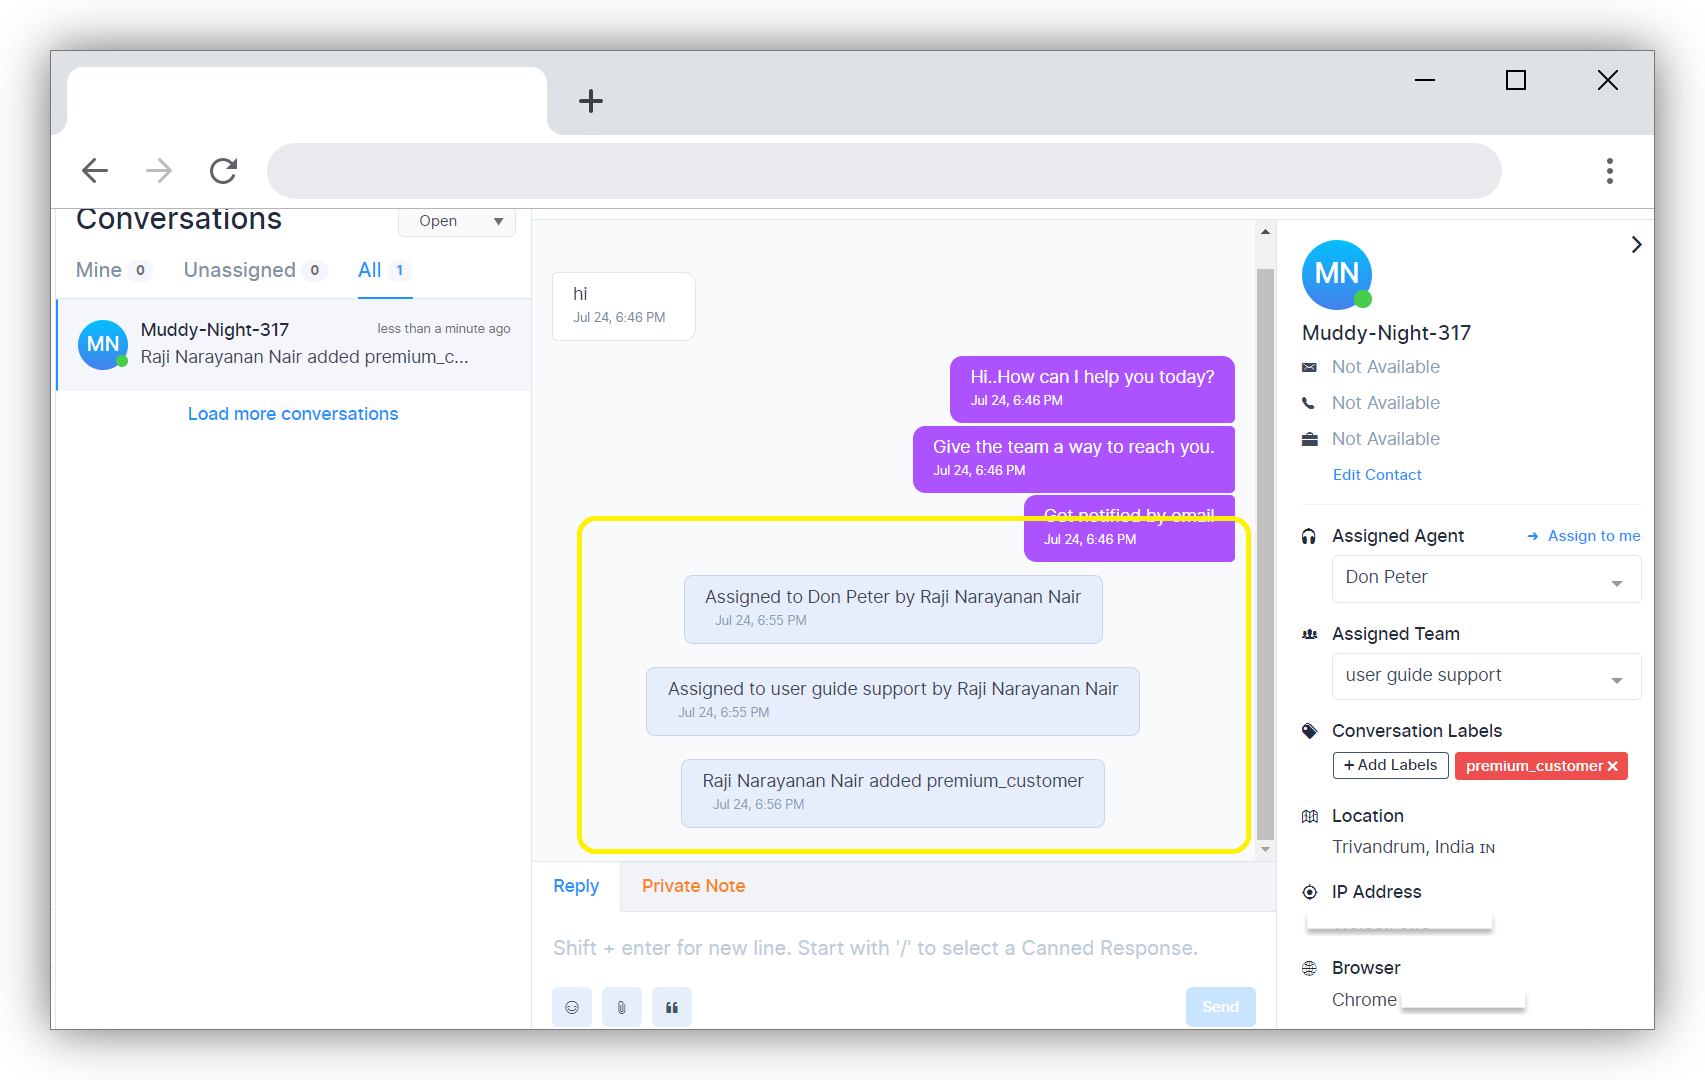
Reply for the Conversation
You can reply to the customer's conversation by typing in the Reply area. Shift+enter will enable you to start typing in a new line.

Click on the Send button to send your message to the customer.
Various options are there in the Reply area to enhance the messages.
 This Button is to select and include Emoji in the message.
 This Button is to select and include attachments in the message.
 This Button enables to use the Rich Text Editor. Additional options appear on the Reply screen as shown below.
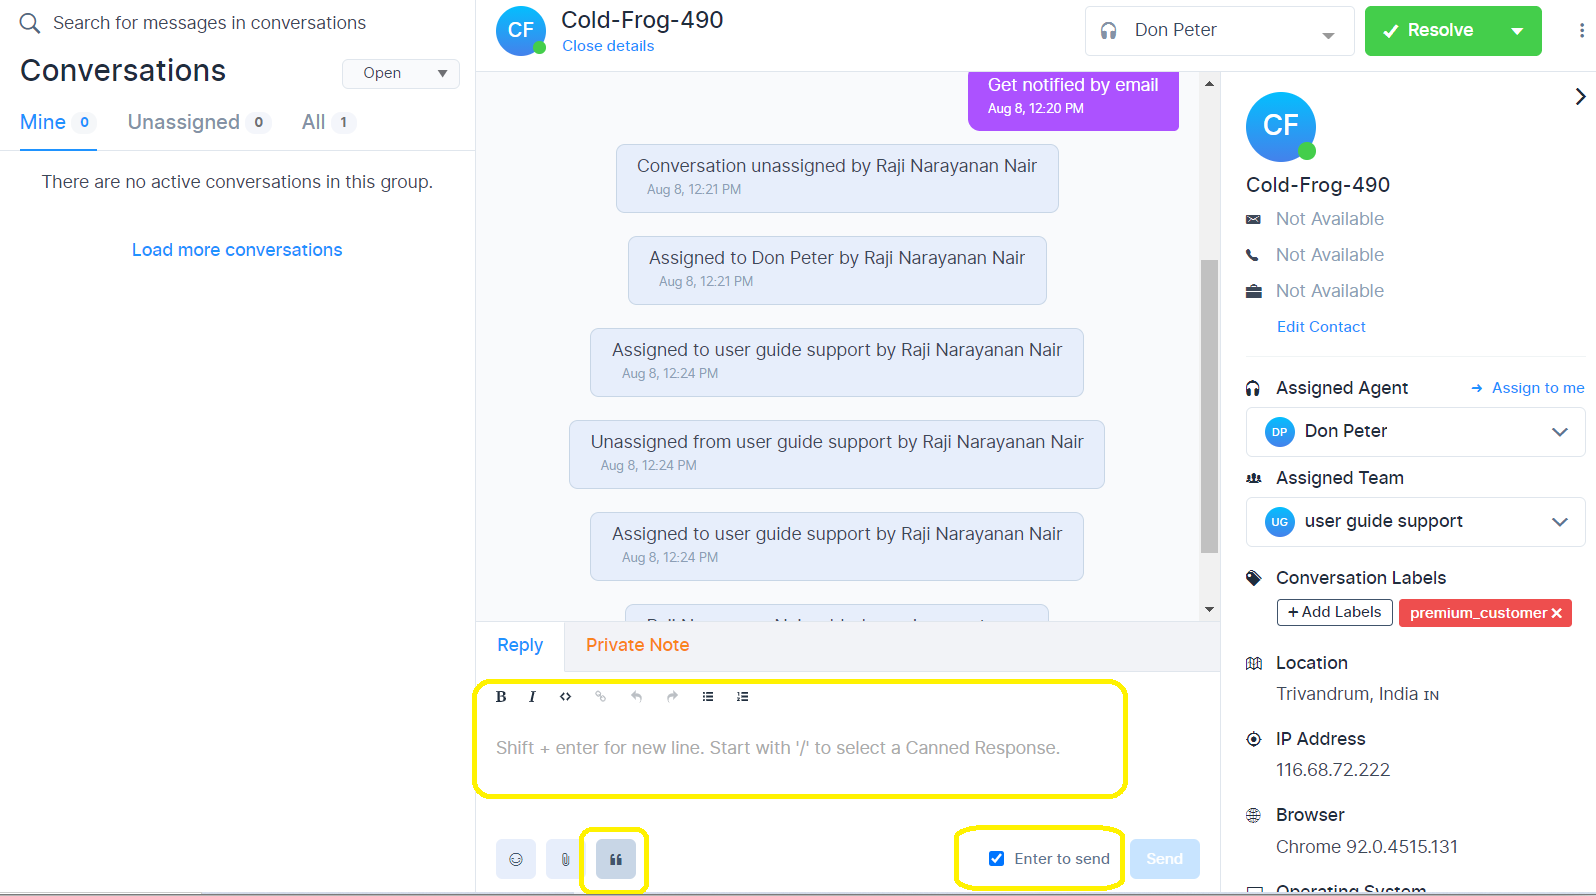
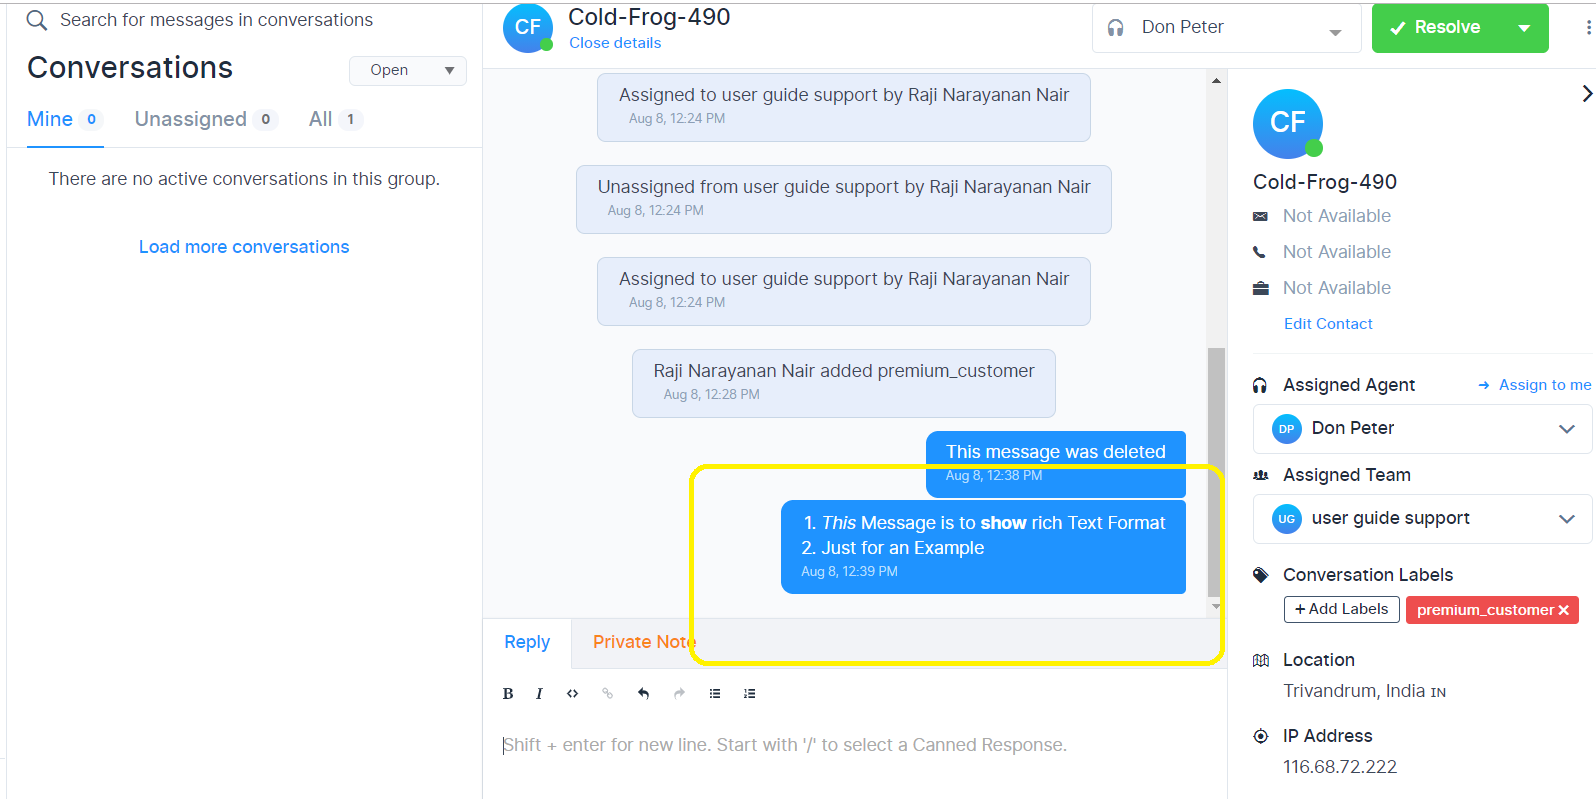
Once the message is typed and edited, you need to tick the checkbox to send the message to the customer. Below is an example of how the message will look like when a Rich text editor is used. If you want to go back to normal text, click on the rich text editor button again.
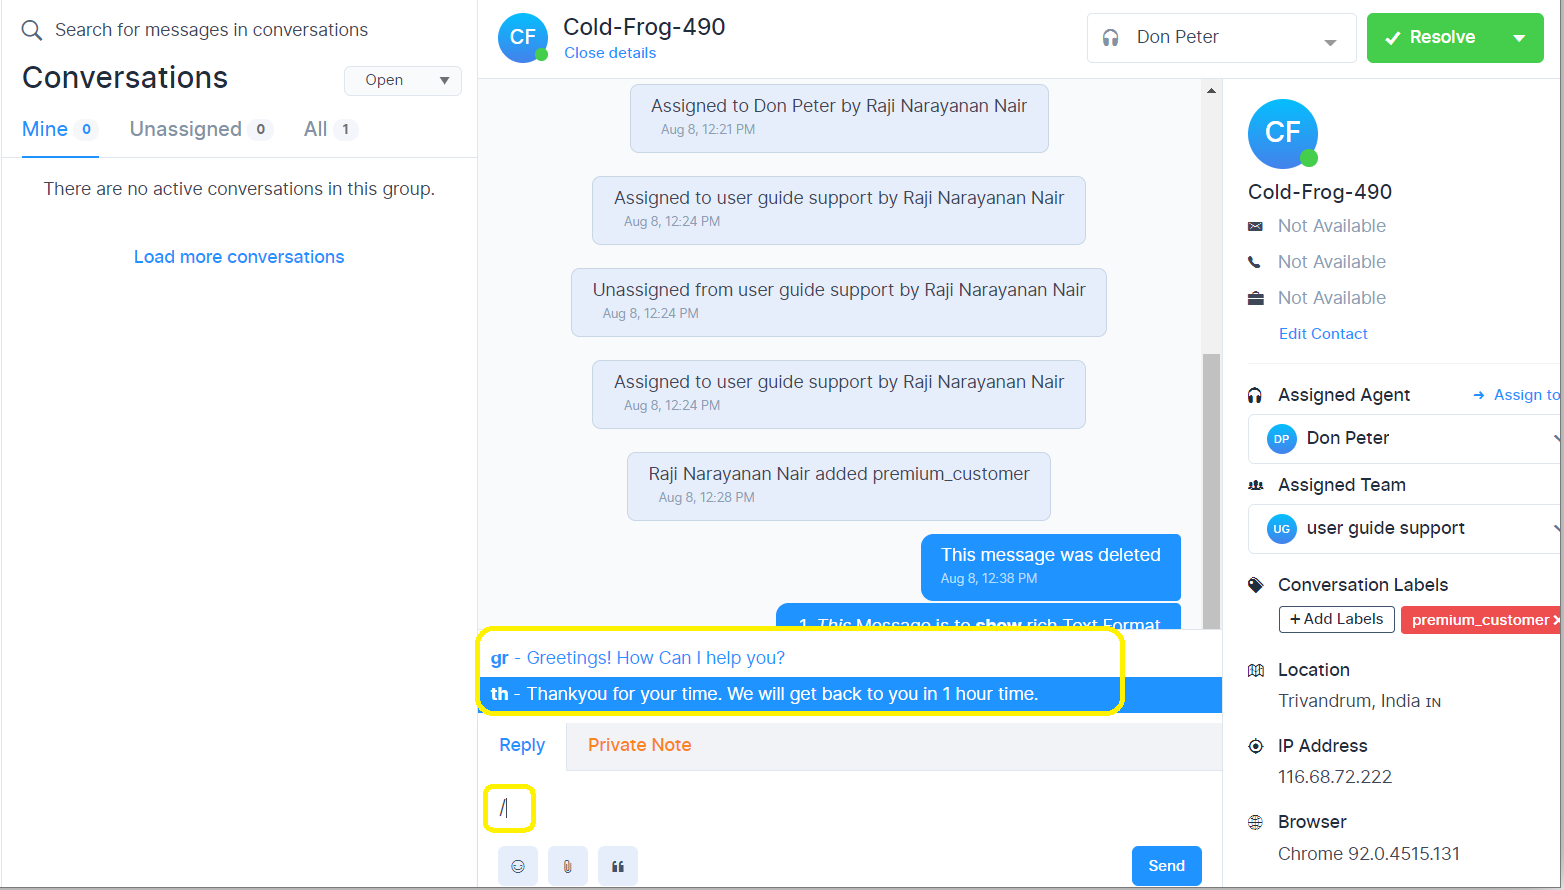
How to Send Canned Responses
Suppose you wish to include already prepared canned responses responses as reply, type '/' and give the short name of the message. An example is given below. Once you type '/', available canned responses will be listed and you can select from these.
Private Chat with Agents
There is an option to discuss the customer's conversation with another fellow agent if you need some more clarification. This option is available just beside the Reply tab, named Private Note.
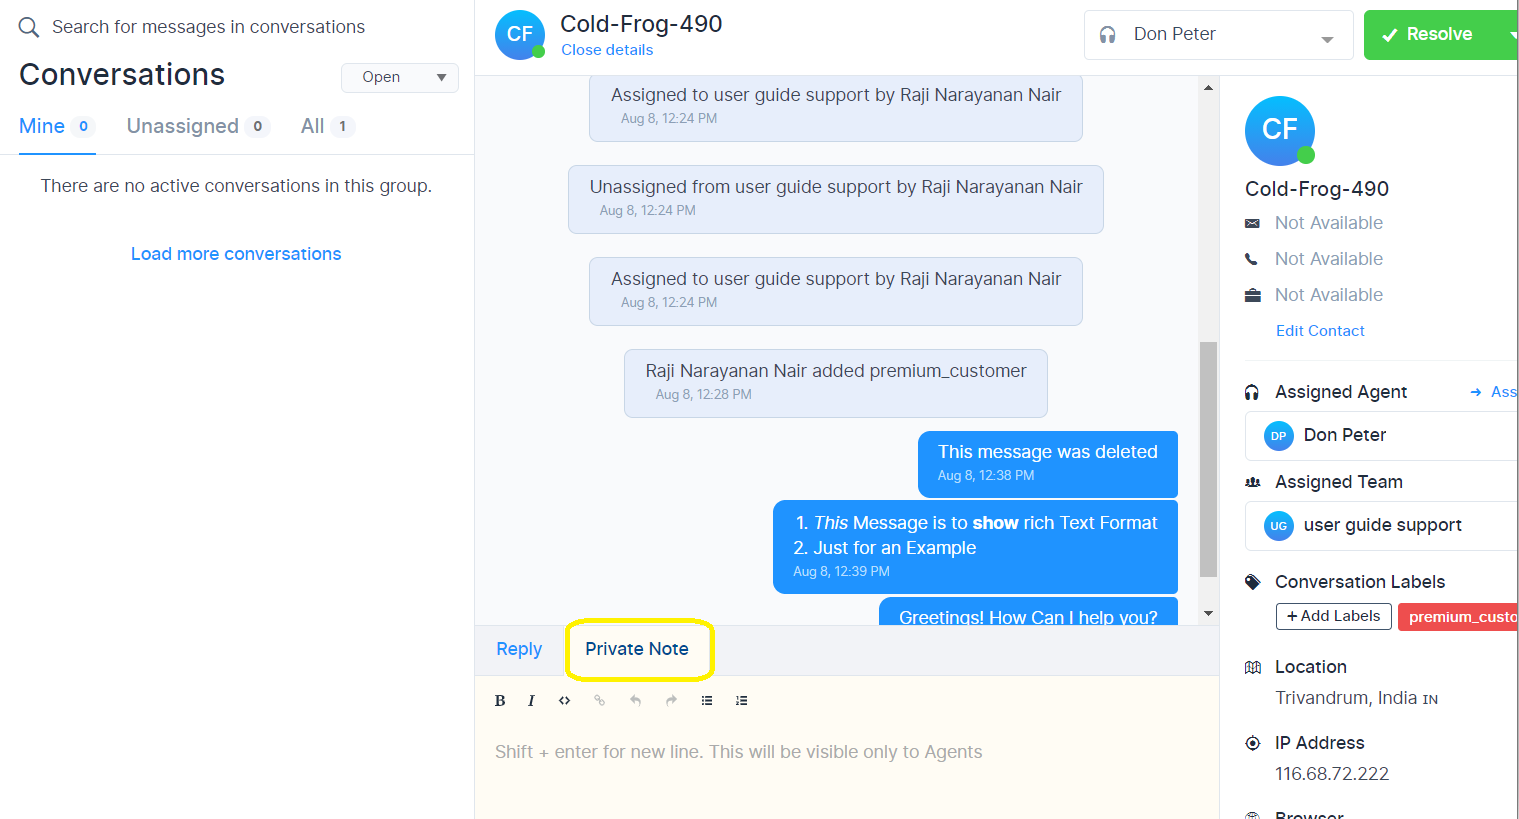
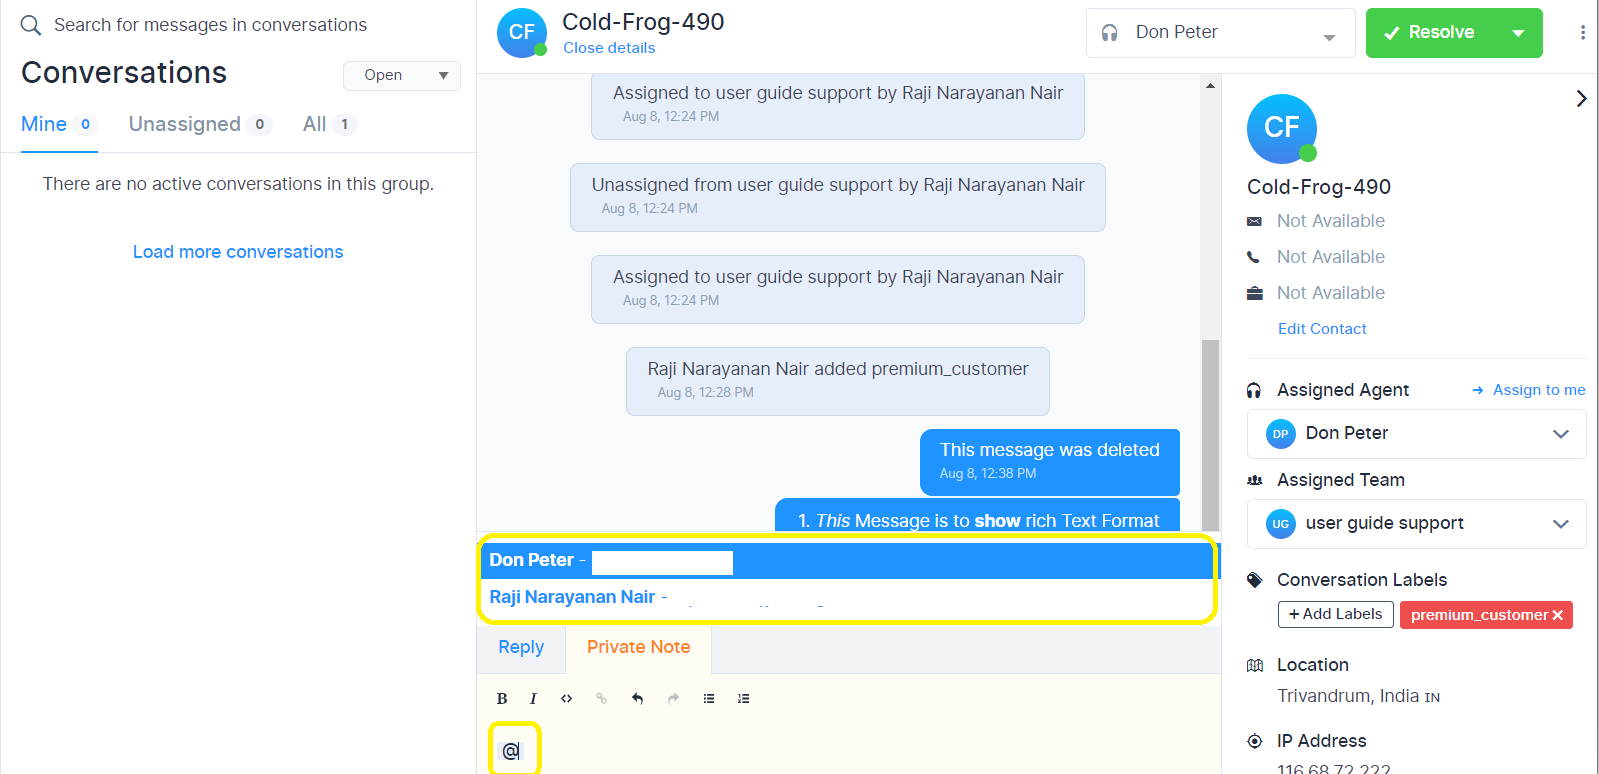
Type '@' in the Private Note Window and all agents who have been added to this team will be listed. Select the agent and type in the message that you want to consult with this agent.
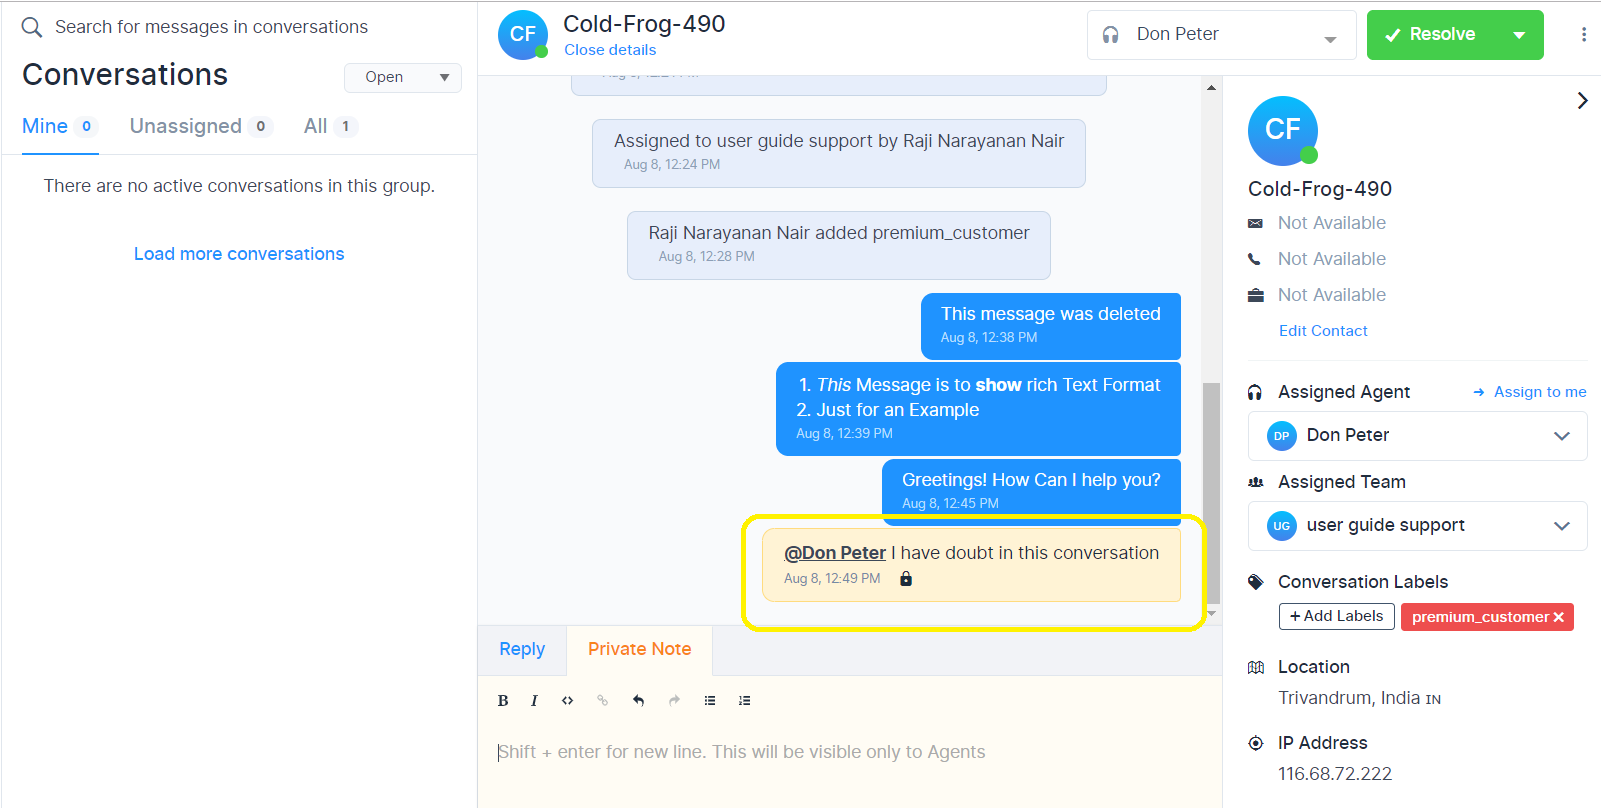
Click on Add Note to send the message. You can see a locked sign on the message that you sent. This message will not be visible to the customer.
The second agent to whom the private chat is addressed, will recieve a notification in his account.
Replies sent by second agent will be visible in your private chat window.
Delete Message
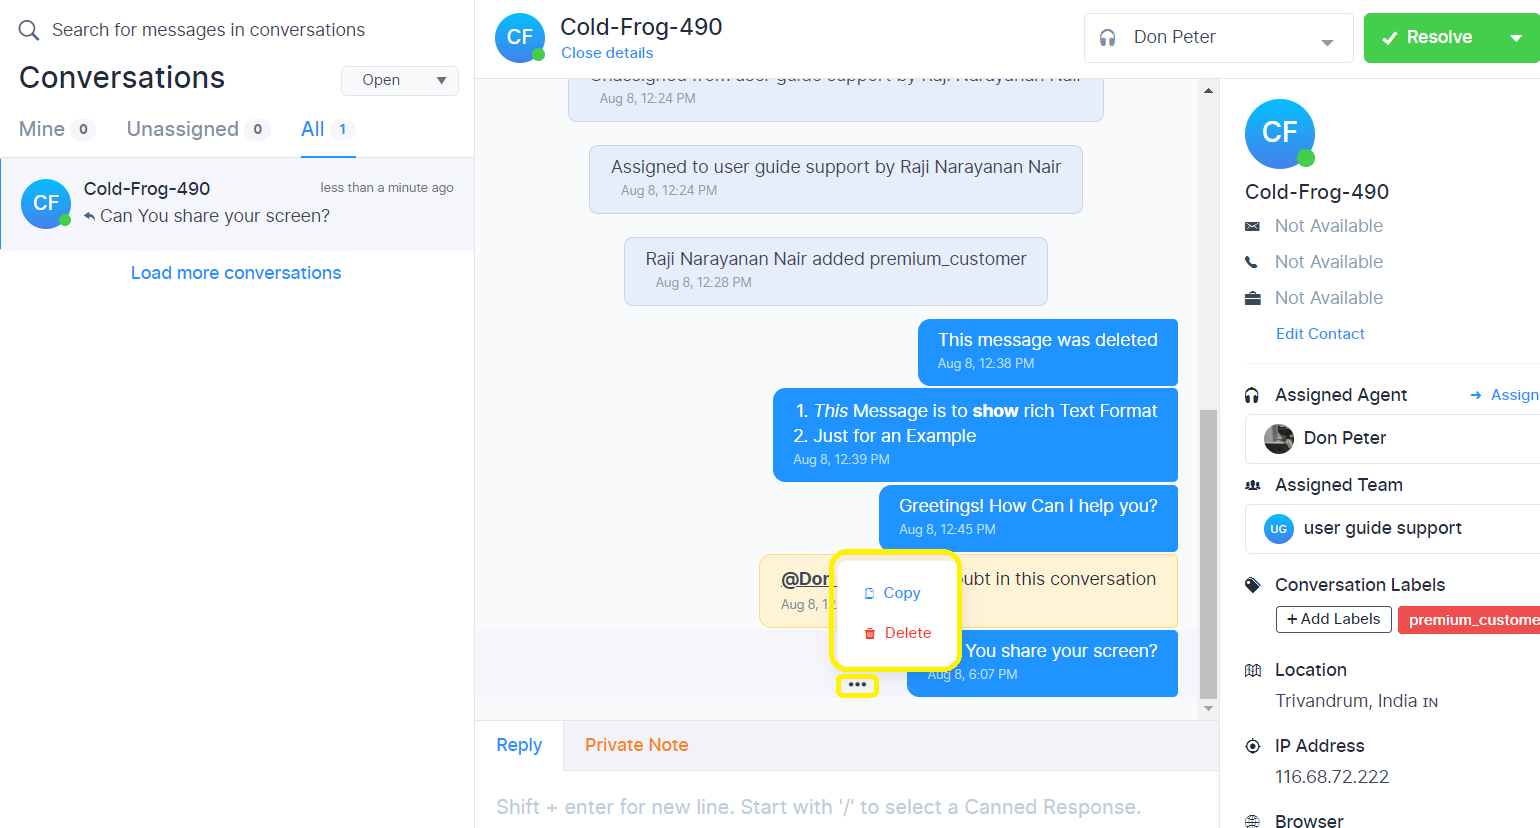
There is an option to delete the message which you have already sent. Click on the 3 dots(...) beside the sent message. Option is available to copy or delete the message. Click on Delete. The message will be deleted.
Sending E-mails
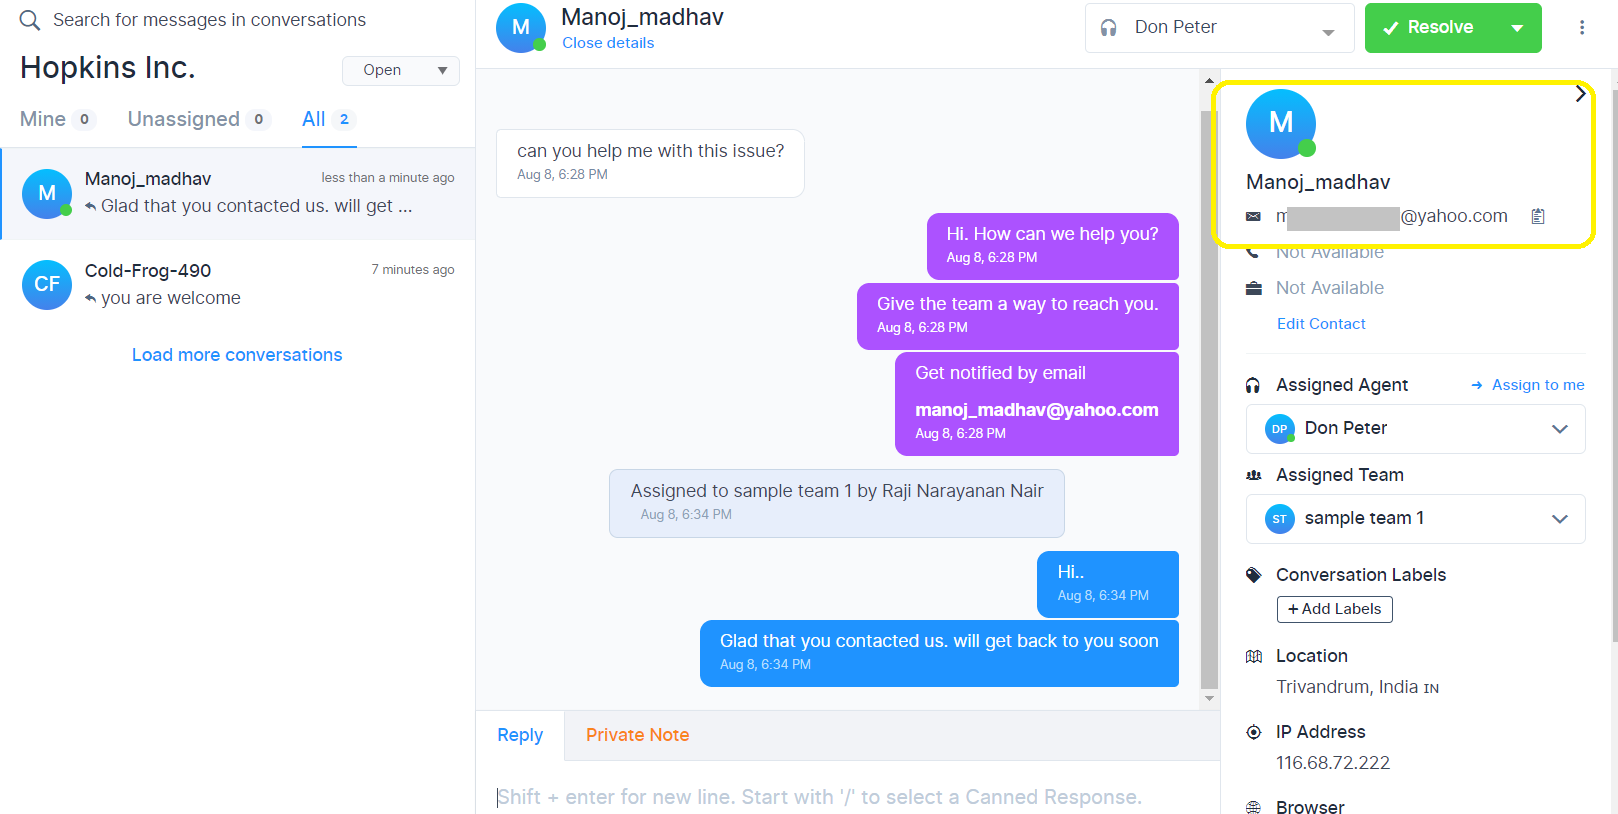
Once the End user has provided their e-mail id through the conversation, Agent can send the chat conversation in email to the customer. The email ID will be listed against the name of the Customer in the details window. The email ID will be automatically added to the Contacts also.
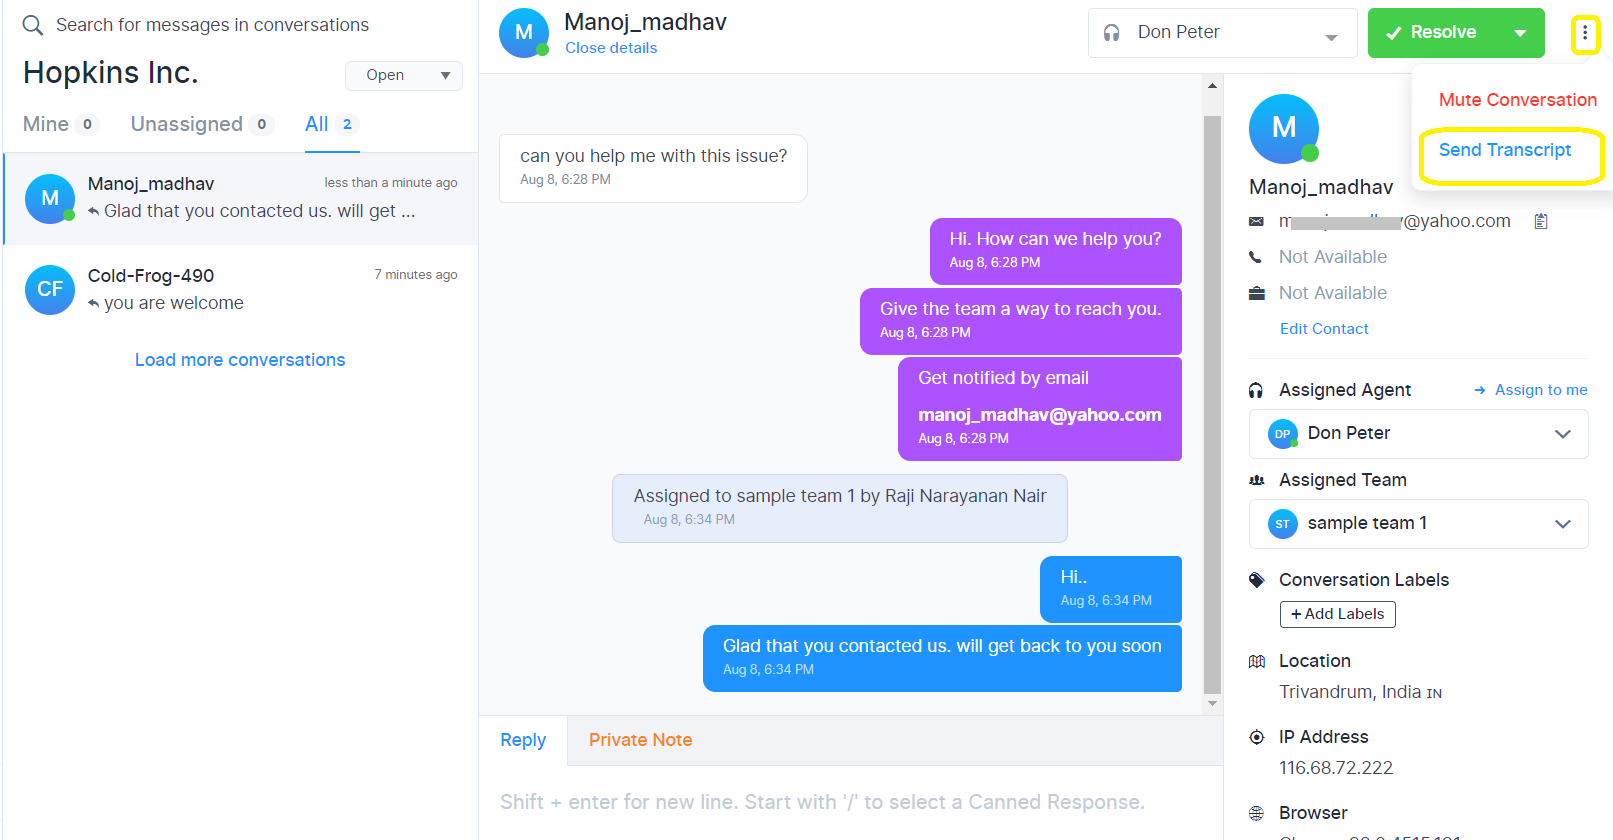
Click on the 3 dots on the top right hand side of the screen. There is an option to send transcript. Click on it.
A screen opens up with first option as 'Send the transcript to assinged agent' and second option as 'Send the transcript to another email address'.
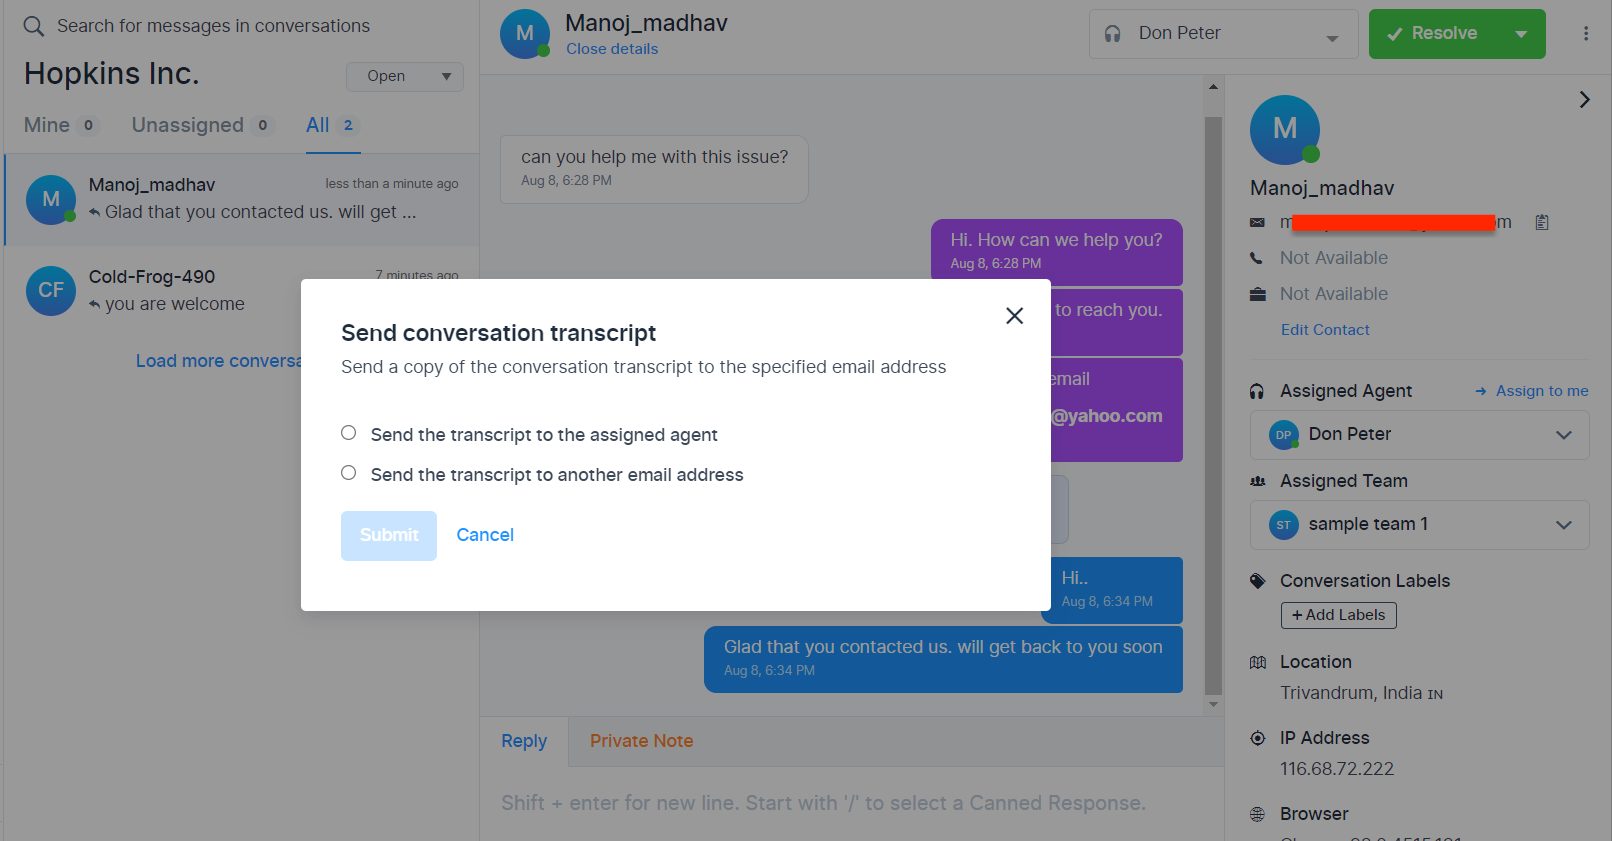
An email can be send to agents in the team by selecting the first option. By selecting second option, and giving the email Id of the end user, the chat transcript can be send to the customer.
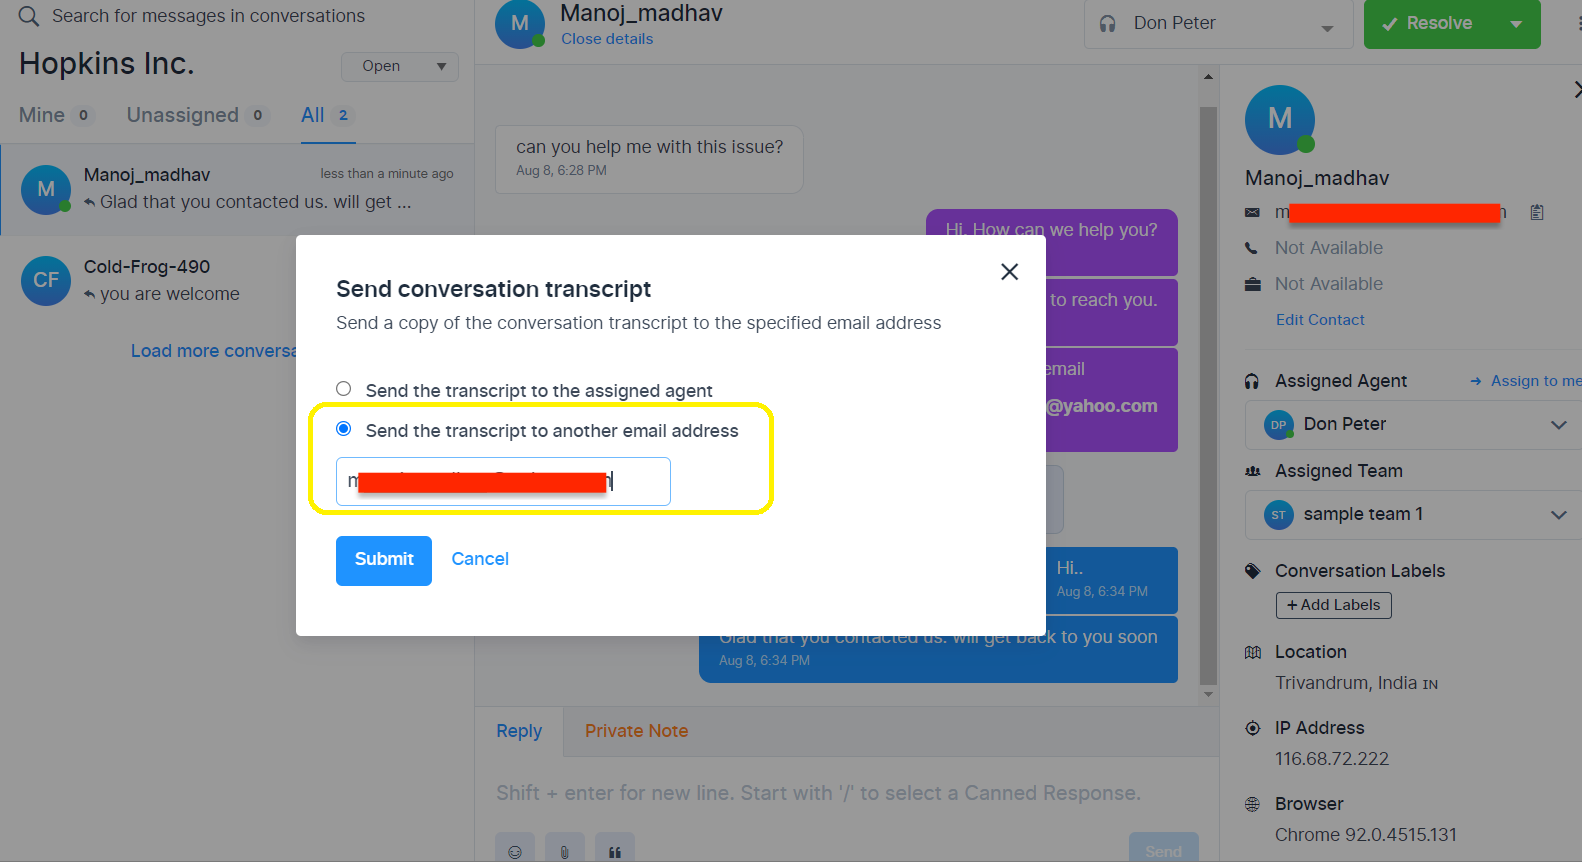
Click on Submit. A message will be displayed "The chat transcript was sent successfully". The End user will recieve the chat transcript in his email inbox.
Sending Emails from Widget
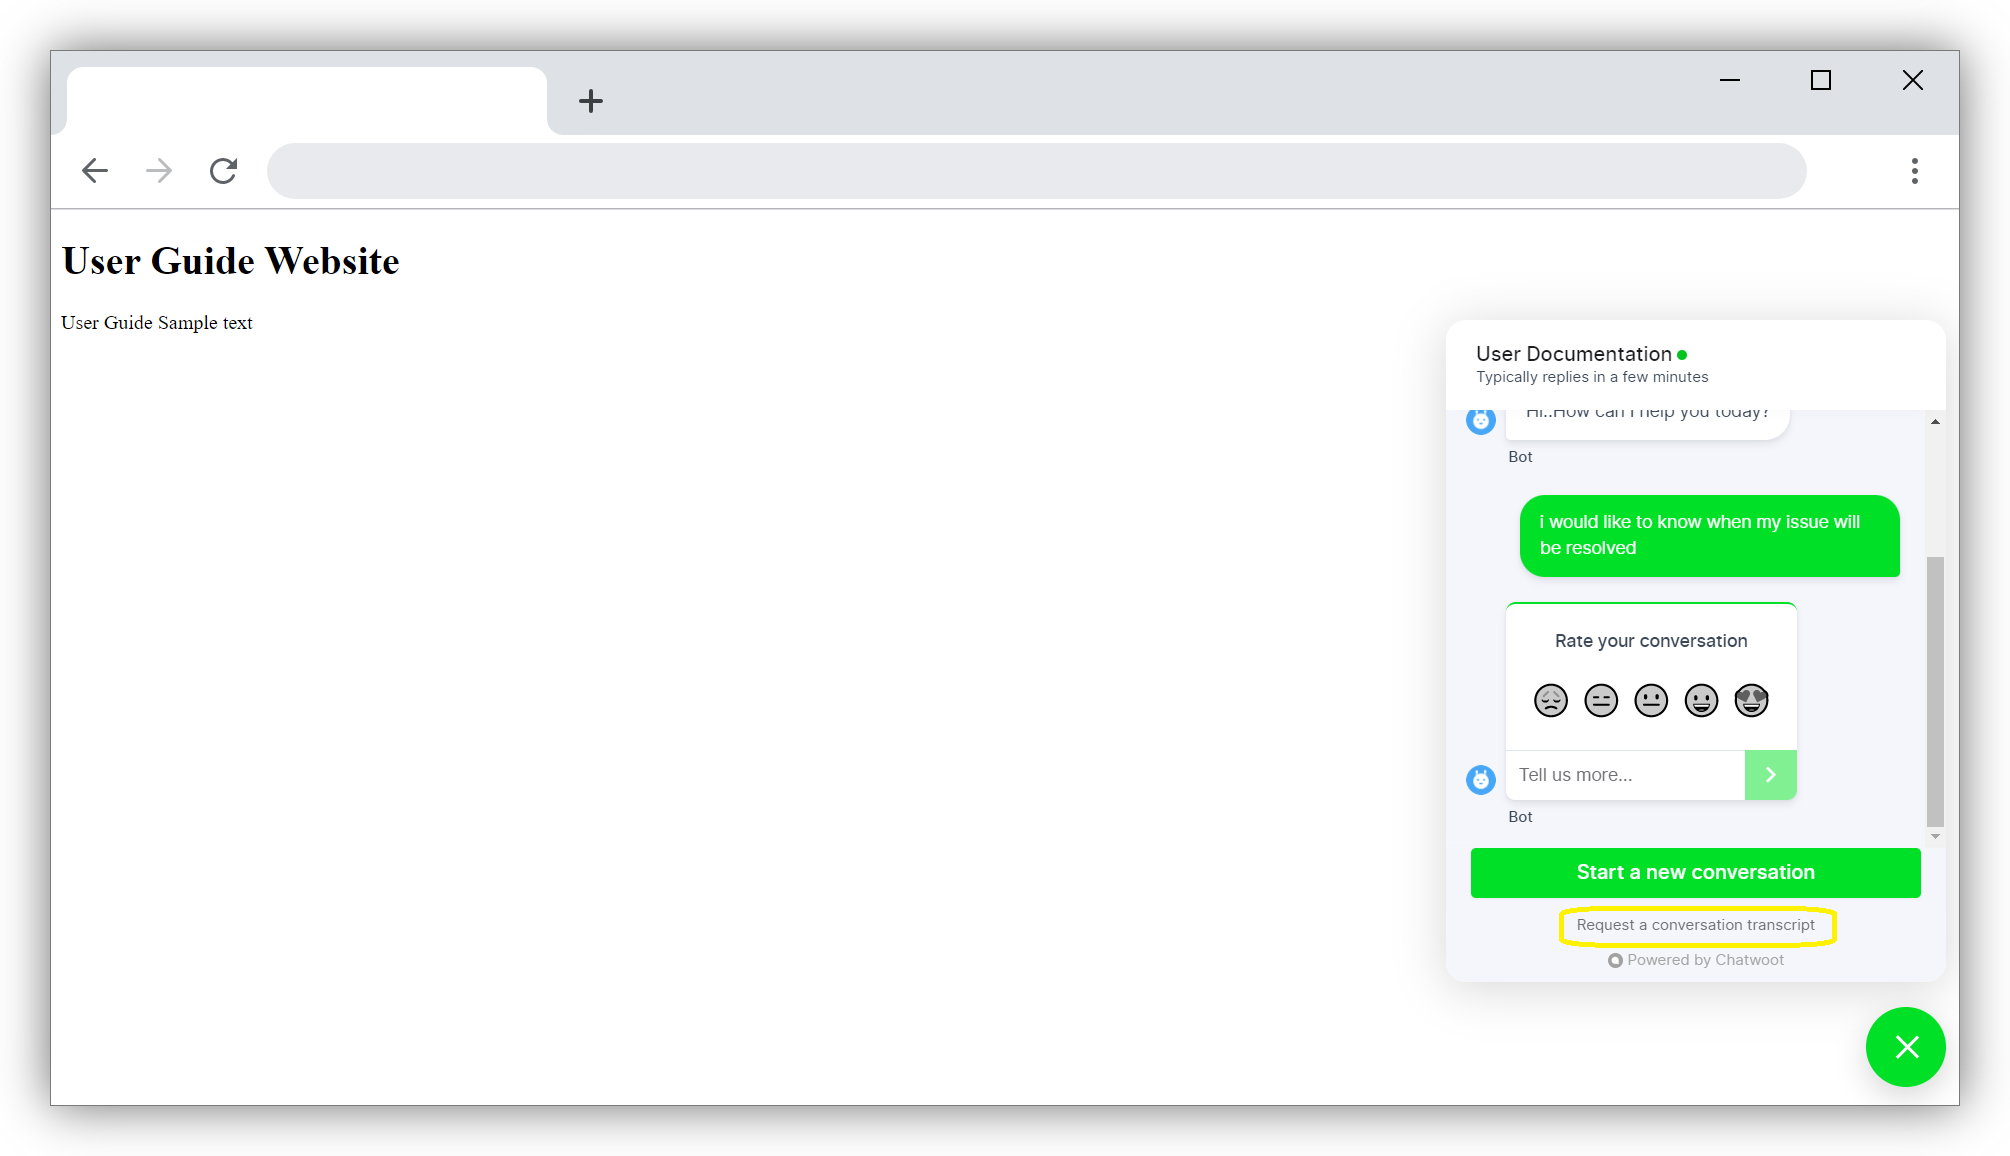
Once the conversation has been marked as 'Resolved' by the agent, an option will appear on the Chatlake Widget as 'Request a conversation transcript'. Customer can click on this and record the conversation in email.
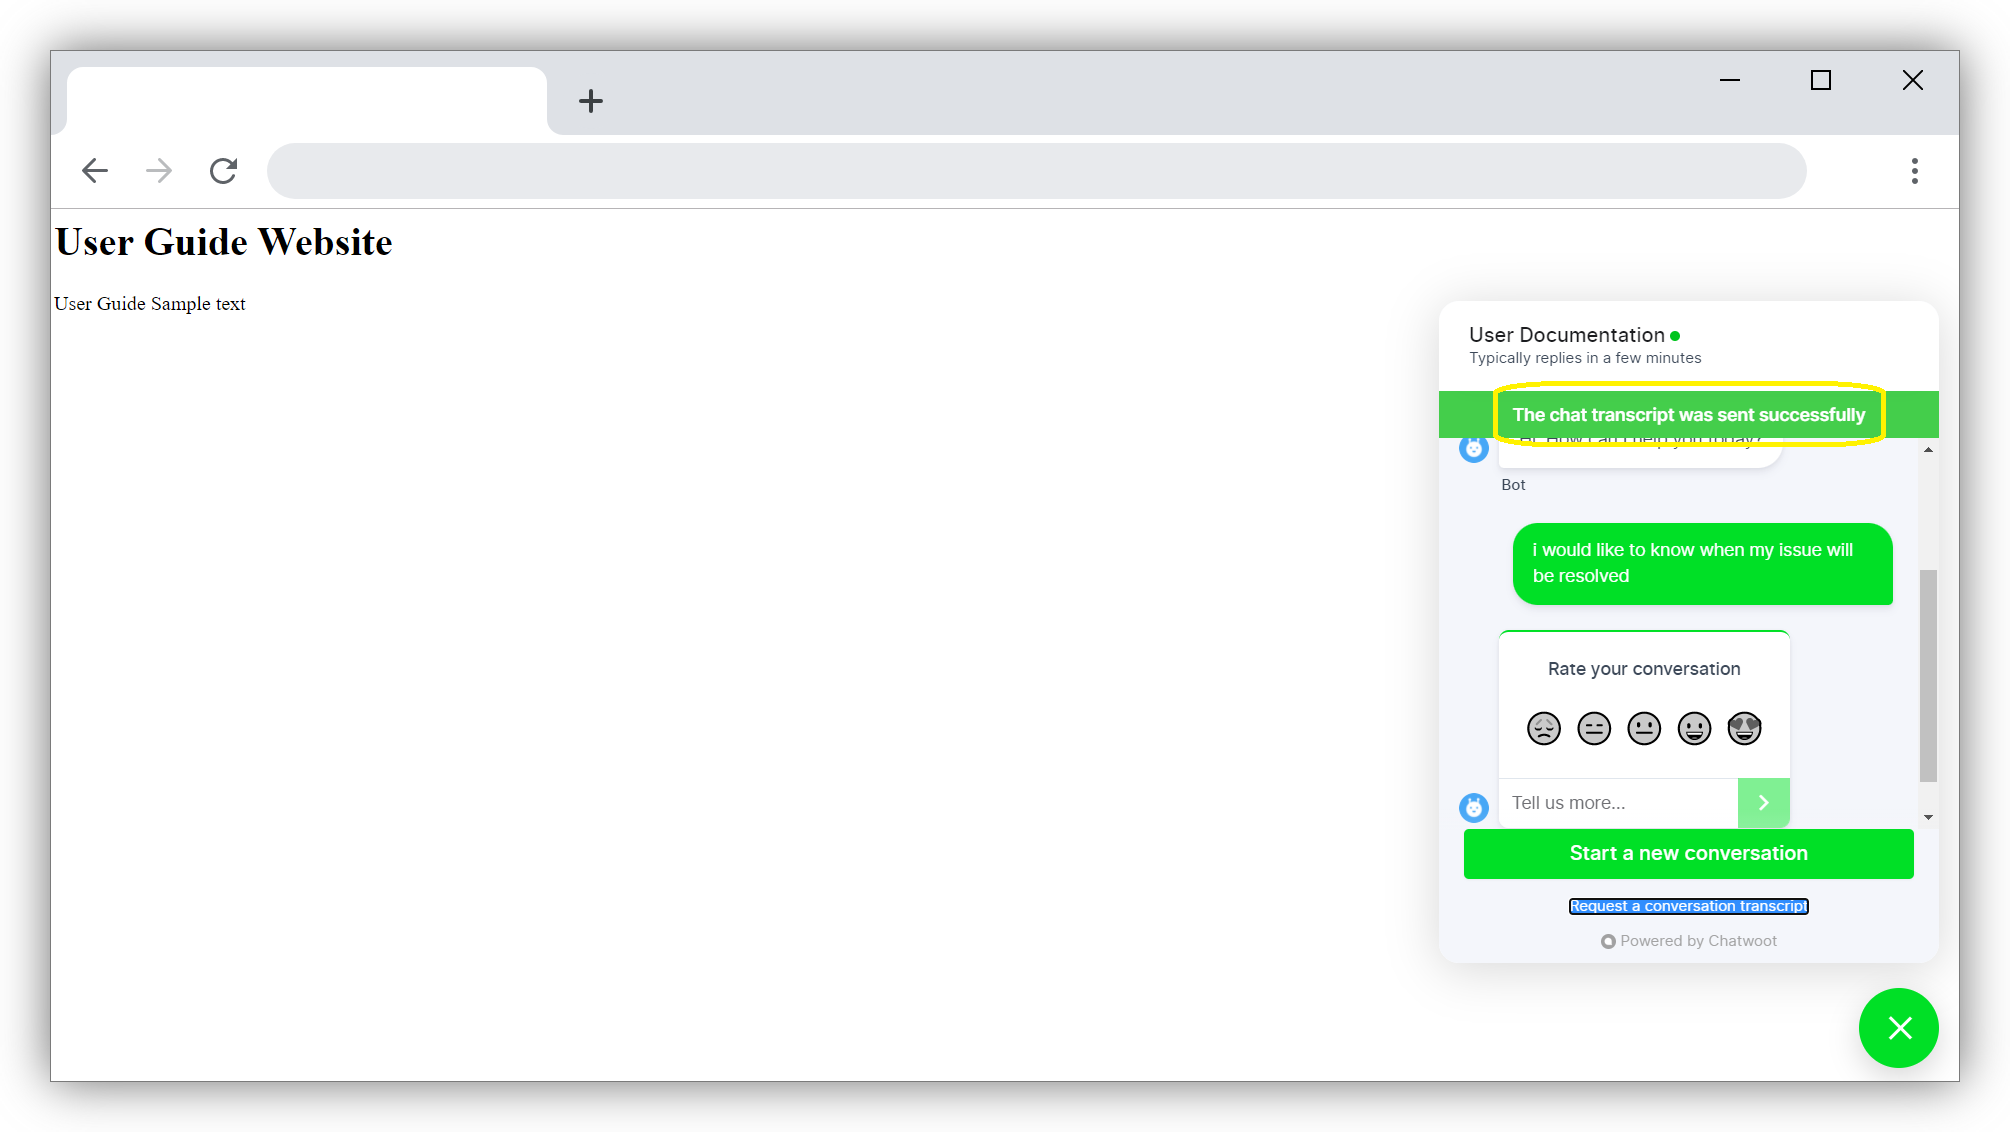
If the Customer clicks on this, an email will be sent to Customer and a message will be displayed on top of the Widget as 'The chat transcript was sent successfully'
Transfering Agents
You can transfer the ticket/issue to another agent by selecting a different agent from Assign Agent option. The whole conversation will be visible to the newly selected agent.
Changing Conversation Status or setting Reminders
Conversation Statuses
Chatlake conversations can be toggled into the following statuses:
Pending : The pending status is used by bot integrations in Chatlake to keep the conversations in a temporary state before the agent can start taking a look at it. Once the bot finishes triaging the conversation, It toggles the status into open. The agent can toggle back the conversation into this state if they want the conversation to be handled by the bot again.
Open : The default conversation status in Chatlake for a new conversation unless a Bot Integration is enabled. These are conversations from customers waiting on a reply from the agent.
Snoozed : If you don't have the full information to resolve a conversation and is expecting further replies, You can toggle the conversation in snoozed statues. This status is also helpful in cases where you need extra time to investigate about the issue and want to move the conversation away from your primary support queue. Snoozed status is also a helpful way to set reminders on a conversation that you want to get to later.
The followed options are supported for Snoozed:
- Snooze Until Next Reply
- Snooze Until Tomorrow
- Snooze Until Next Week
Resolved : These are conversations which has been addressed and requires no further communication. The Resolved status is equivalent to closing the customer support ticket.
Workflow
The agent can choose appropriate conversation status once the solution is conveyed to the customer.
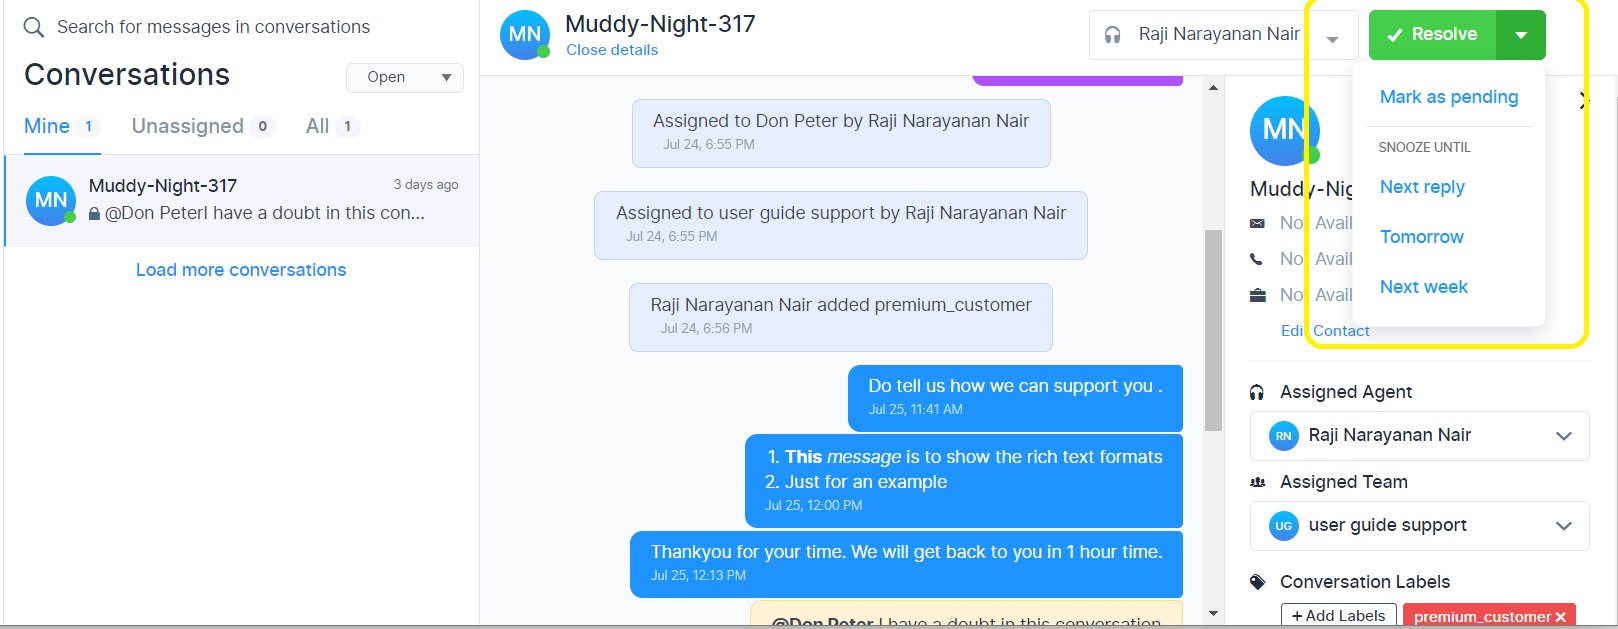
The allowed options are given below:
| Options | Actions |
|---|---|
| Mark as Pending | Change the issue to Pending status |
| Resolve | Change the issue to Close status |
| Reopen | Change the issue to Open status |
| Open | Change the pending issue to Open status |
| Snooze Until Next Reply | The issue will be set aside for now and status will change to open on next reply from customer |
| Snooze Until Tomorrow | The issue will be set aside for now and status will change to open on next day |
| Snooze Until Next Week | The issue will be set aside for now and status will change to open on next week |
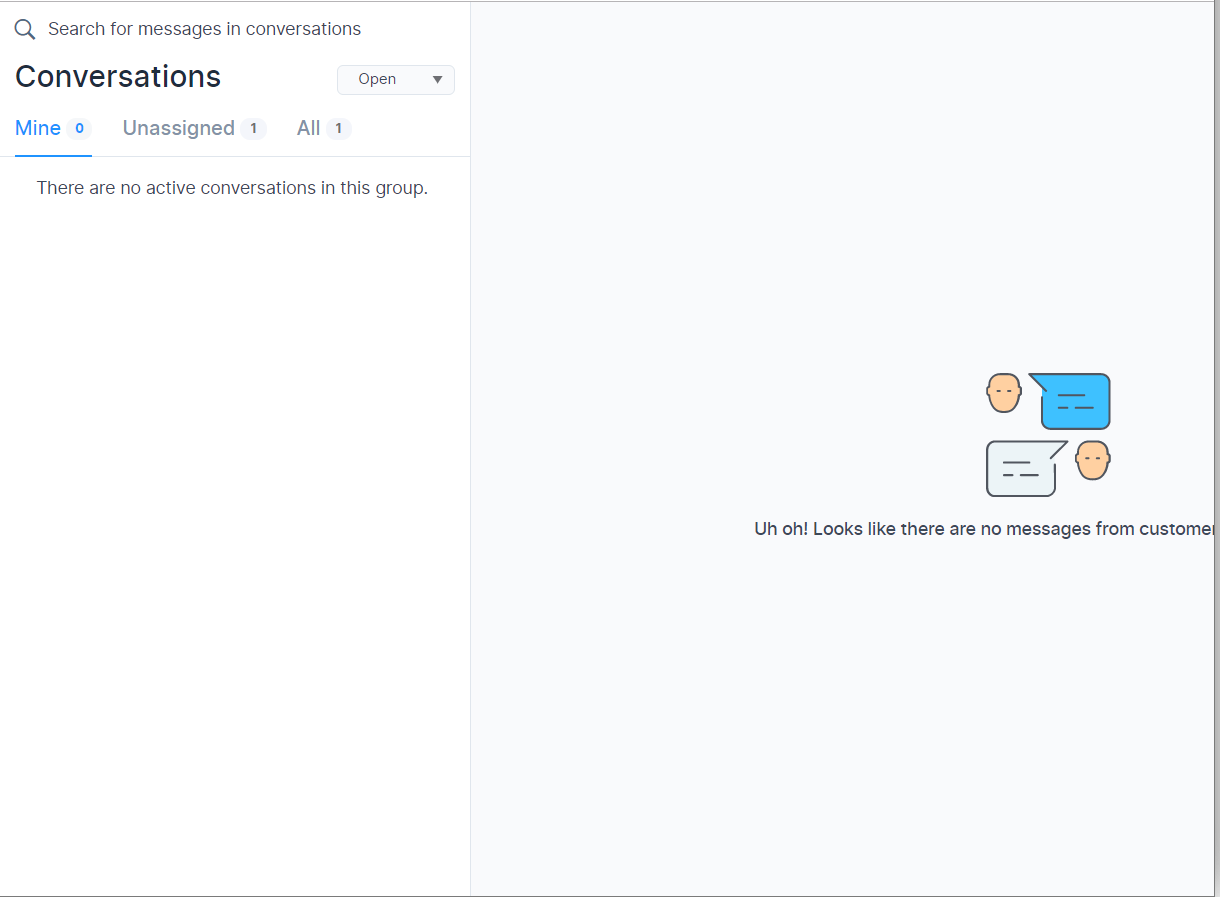
The Conversations can be selected and viewed as per their status on the Conversation section as below.
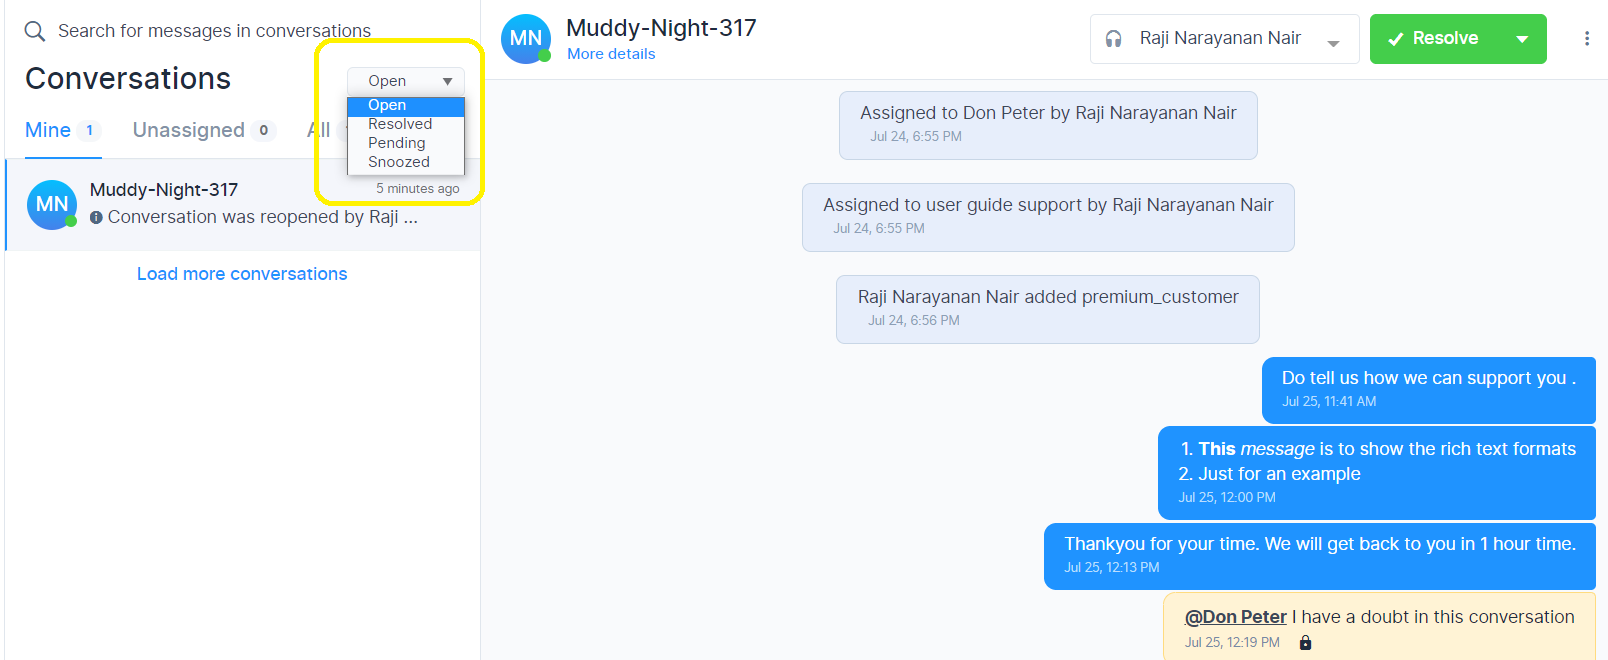
Note: When an agent changes the conversation status to open, the conversation will automatically assign to that agent.
CSAT
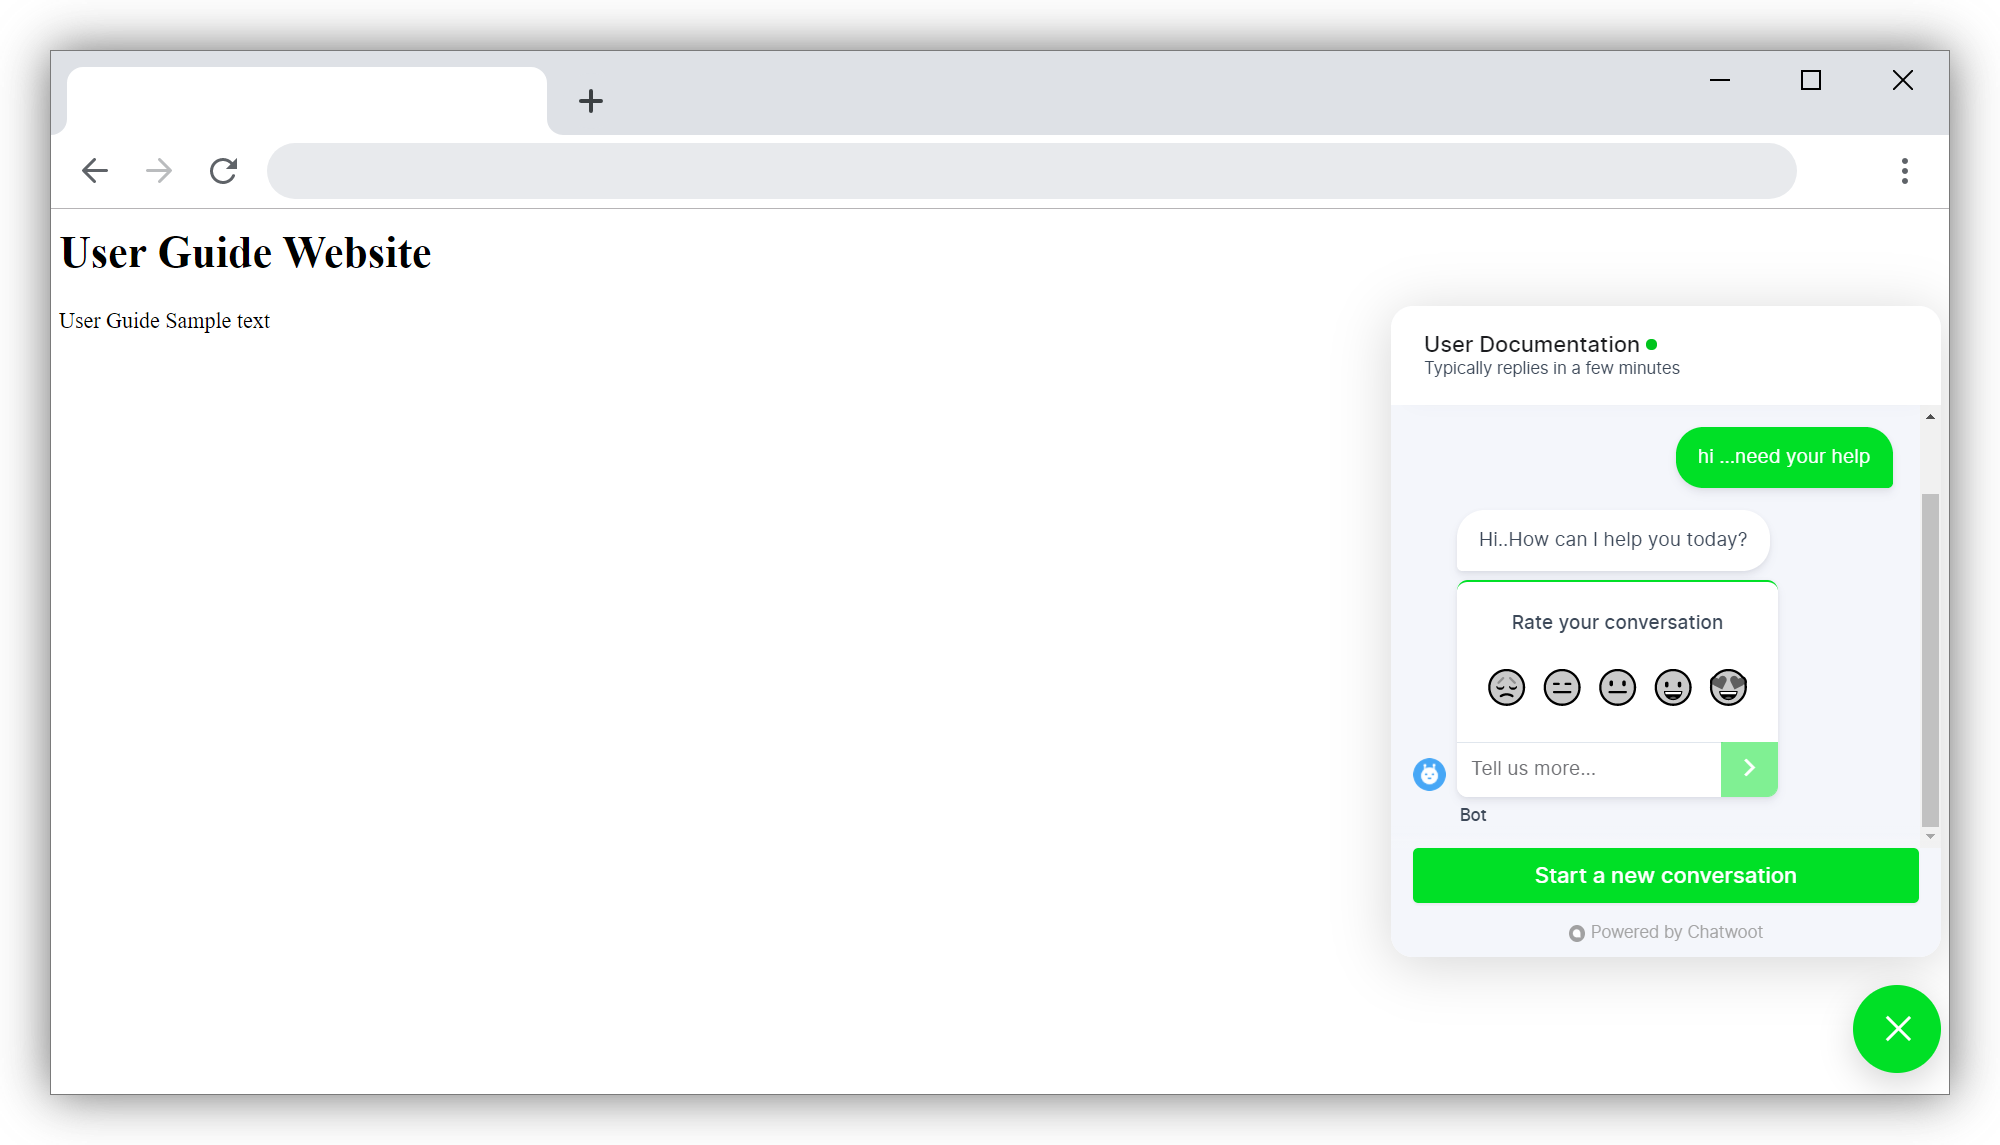
Once the ticket or conversation is marked as 'Resolved', if the CSAT option is enabled, the survey will be sent to customer in the widget as below
The response from the customer can be viewed in CSAT section in Reports.
Previous Conversations
Once the conversation has been marked as resolved and CSAT has already been obtained - next time the same customer starts a new conversation, the Previous conversation associated with the customer will be shown on the screen. This will help the agent to understand the history of the customer's issue.
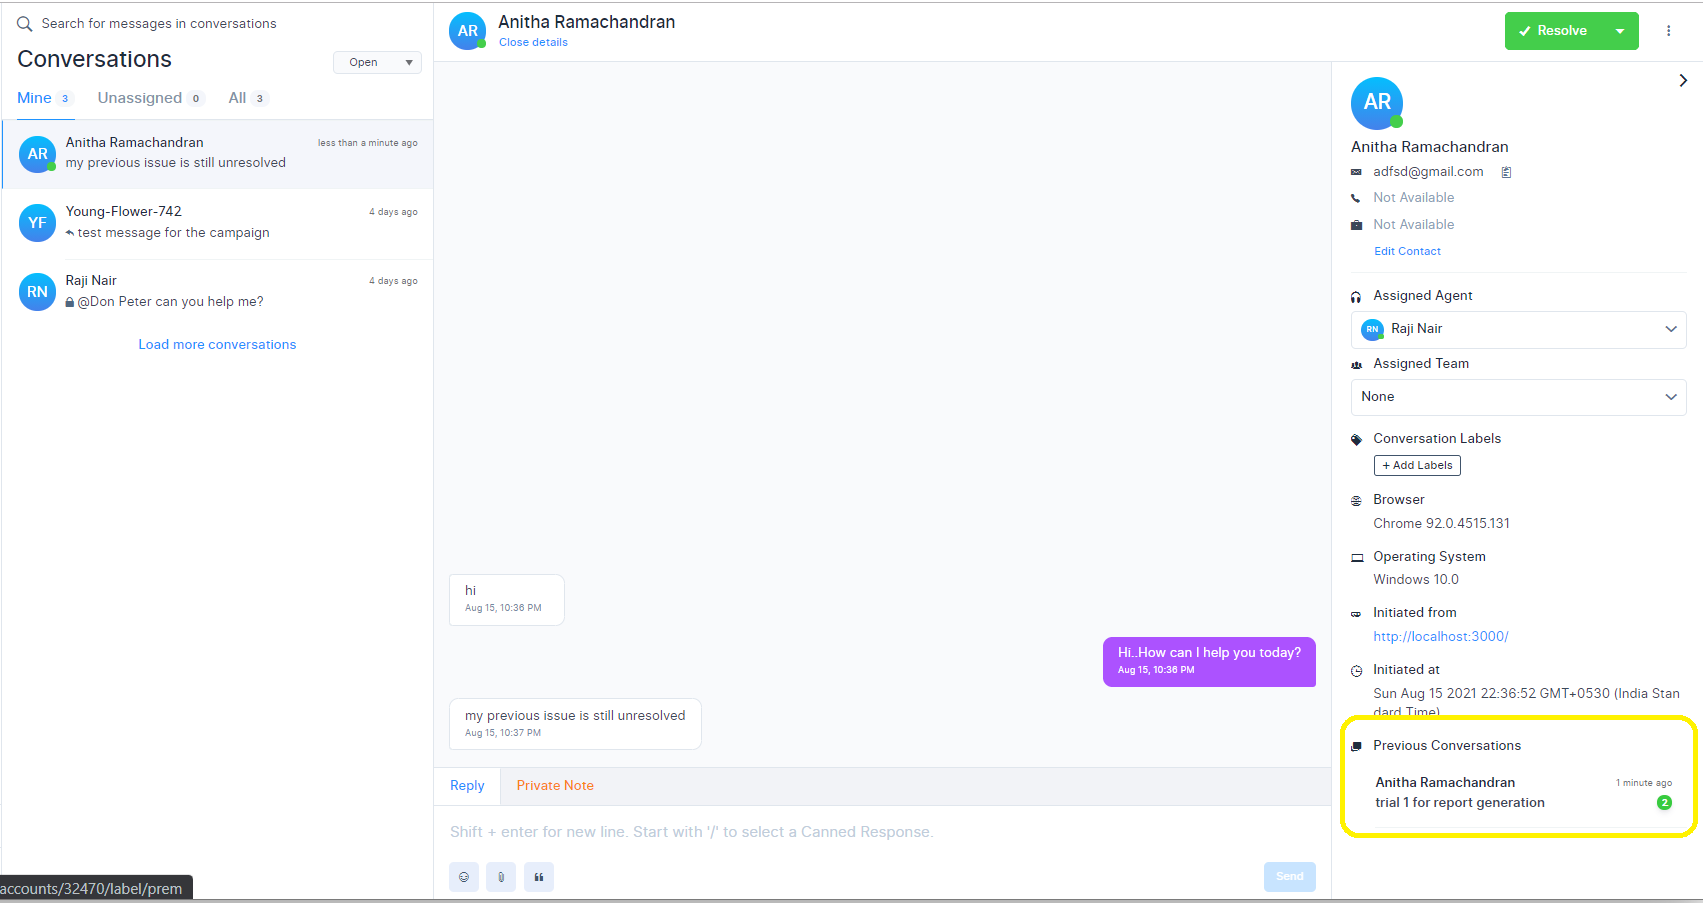
Click on the name below the Previous Conversation and the details of the past conversation opens up as below. This can be used as reference for the agent.
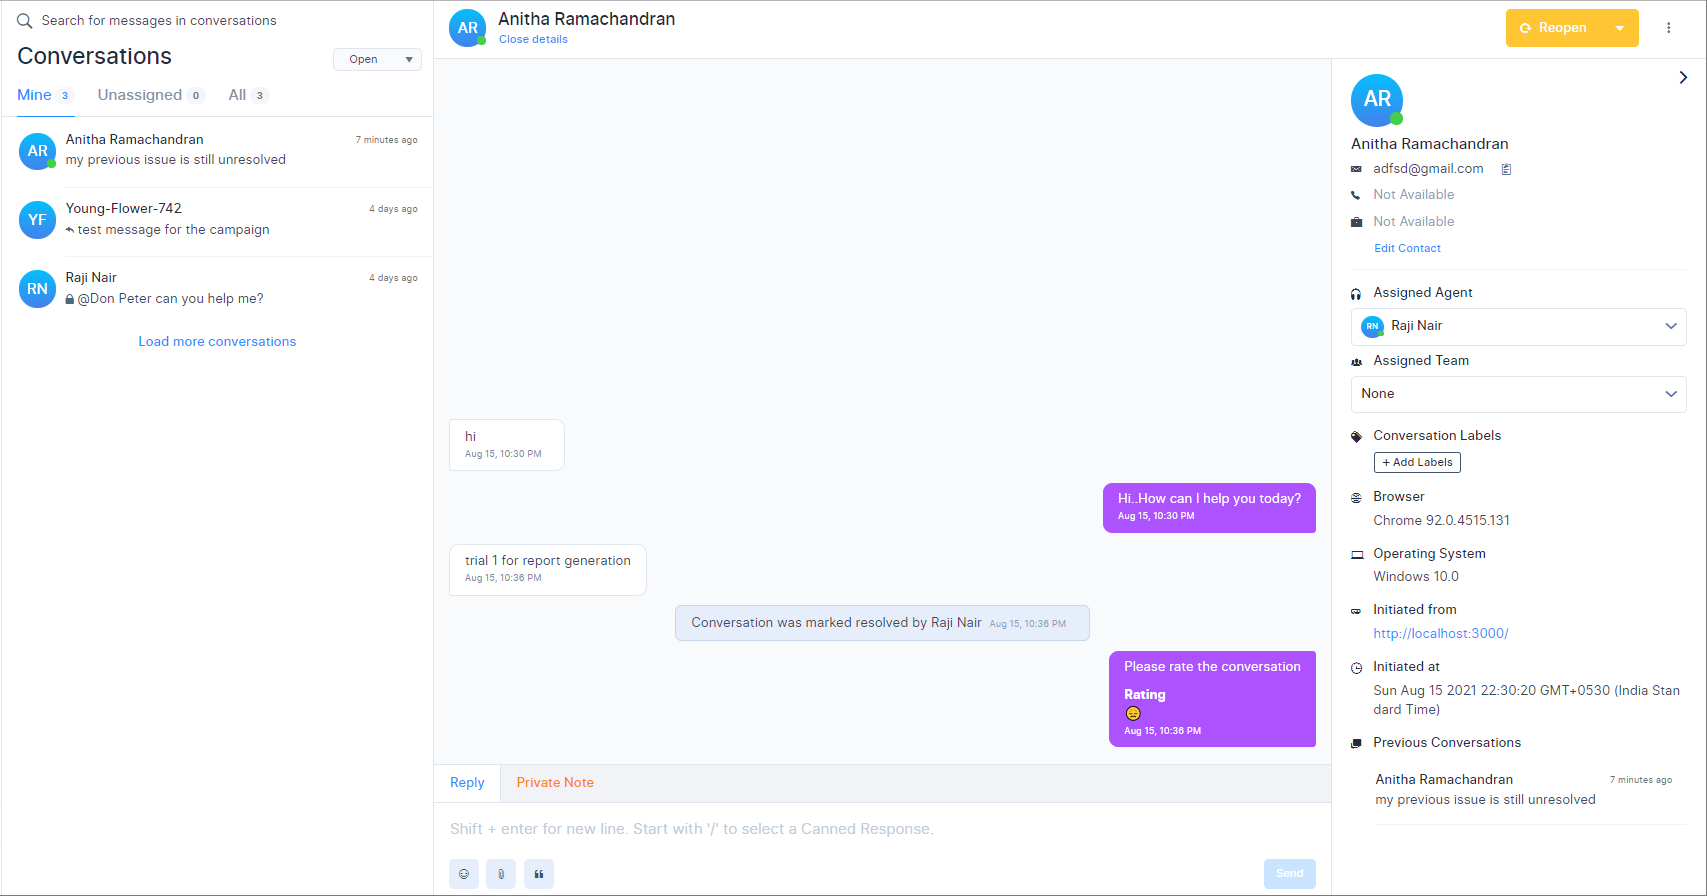
If there has been more than one conversation from the same customer, all will be listed under Previous Conversations. Agent can select which ones to view.